One of the best things about salmon is that there are so many different ways to cook it. Out of all of them, slow-roasting has got to be my favourite. It is still fish and so in this case, slow-roasting only means a mere 30 minutes or so. Once it comes out of the oven, you will have the most succulent salmon that is never overdone, never dry. It’s virtually impossible with all of that olive oil sitting on top of it.
But the salmon isn’t even the best part of the story. Because really, it’s just a vehicle for that refreshing pineapple salsa. It’s so fresh, even when you use frozen pineapple like I did. Get a little bit of everything all in one bite and it truly is a beautiful thing.
Ingredients for the salmon:
2 pound boneless side of salmon (I leave the skin on until I serve, as it’s not meant to be eaten in this recipe)
Salt
Pepper
Enough olive oil to just cover the salmon
6 – 8 lemon slices
Ingredients for the pineapple salsa:
1 cup frozen pineapple chunks, thawed and finely chopped
1/2 red onion, finely chopped
1/2 red bell pepper, finely chopped
1 jalapeño pepper, minced with some seeds (leave seeds out if sensitive to heat)
1.) Mix all ingredients for the pineapple salsa well. Place in fridge and let sit for at least one hour to allow flavours to marry.
2.) Preheat oven to 325 degrees Fahrenheit.
3.) Place salmon, skin-side down, into a greased 9″ x 13″ casserole dish and season with salt and pepper. Cover with enough olive oil just to cover the fish. Lay lemon slices over top.
4.) Place salmon into preheated oven and roast for 30 – 35 minutes, until it is just starting to flake and is cooked through.
5.) After removing salmon from oven, use a spatula to separate the flesh from the skin. Plate salmon and top with pineapple salsa.
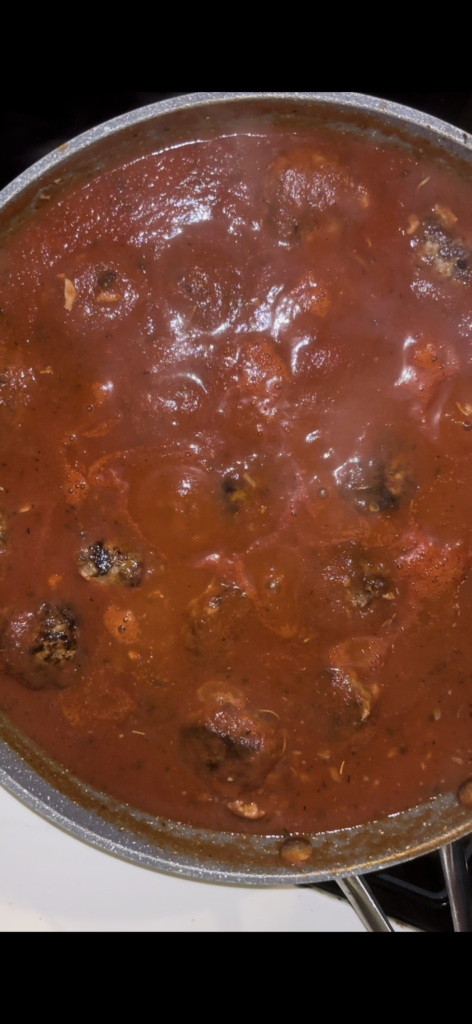
Meatballs are always a great answer when you need a quick supper, and I already have a couple of recipes up on the site. Those recipes are some variation of meatballs, or they are someone else’s entirely. I can’t believe that it’s taken me 15 years to get you the recipe for MY meatballs. It’s probably better that way, though. I have made little adjustments to them over the years that have made them the very best. They are browned on the outside but still incredibly tender, and they practically melt in your mouth when they are robed in that beautiful sauce.
It may have taken me awhile to get this meatball recipe to you, but good things come to those that wait. And these are very, very good. Even better? You won’t have to wait too long until dinner’s on the table.
Ingredients
For meatballs:
1 cup of bread crumbs
3/4 cup of milk
1 tablespoon onion powder
1 tablespoon garlic powder
1 tablespoon Italian seasoning
3 tablespoons grated Parmesan cheese
2 eggs, beaten
2 pounds of ground beef, or ground meat of your choice
Salt, to taste
Freshly ground black pepper, to taste
1/4 cup of olive oil
For marinara sauce:
1 tablespoon of olive oil
3 cloves of garlic, minced
1 tablespoon Italian seasoning
1 24-ounce jar of tomato puree
Salt, to taste
Freshly ground black pepper, to taste
Directions:
1.) Add bread crumbs and milk to a bowl and stir. Let sit for about 10 minutes to allow the bread crumbs to absorb the milk.
2.) Add onion powder, garlic powder, Italian seasonings, salt, pepper, and Parmesan cheese. Add beaten eggs and stir.
3.) Add two pounds of ground meat of your choosing and mix. Do not over-mix. Use the tips of your fingers to gently mix the other ingredients with the meat, and stop mixing once everything is incorporated.
4.) Using an ice cream scoop, form into balls and smooth them by rolling with your hands. Place on non-stick baking sheet, and repeat with remaining meat mixture.
5.) Once all meatballs have been rolled, place into the fridge for at least 30 minutes to allow them to firm up a bit.
6.) After meatballs have set, heat 1/4 cup of olive oil in a frying pan over medium heat. When hot, add meatballs in batches, if necessary, to avoid overcrowding the pan.
7.) Brown meatballs on all sides, for about 5 – 7 minutes each. When all meatballs are browned, remove to a plate and set aside.
8.) Drain the fat from the pan and add 1 tablespoon of fresh olive oil. Add minced garlic and 1 tablespoon of Italian seasoning and stir. Cook for about 30 seconds.
9.) Add jar of tomato puree. Fill jar with water, swirl to get excess puree, and add to pan. Stir well and season with salt and pepper.
10.) Add meatballs back to the sauce. Stir gently and cook for another 10 – 20 minutes, until the sauce thickens slightly and the meatballs are cooked through.
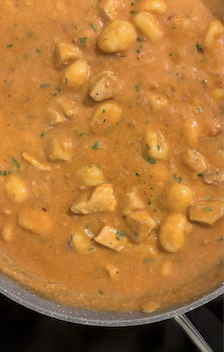
I used to be the type that would turn my nose up at recipes that included canned soup and other prepared mixes. It was probably a bit snobby of me but at the time, I thought scratch should mean just that – scratch. The pandemic taught me, though, that not all ingredients are available at all times and there is absolutely nothing wrong with making substitutions, even when they are not completely necessary. This gnocchi recipe shows just how delicious food can turn out when you use these prepared ingredients and as a bonus, they take just a fraction of the time to make. And after all, I wasn’t making the gnocchi from scratch, so who really cares how the sauce was made? I certainly don’t, and I’m sure I will make it again.
Ingredients:
5 slices of bacon
2 boneless, skinless chicken breasts, diced into bite-size pieces
1.) Place bacon in a skillet. Turn heat to medium and fry until crispy, flipping often. When bacon is finished, drain on paper towel and then chop into smaller pieces.
2.) Keep the frying pan on medium and add chicken pieces. Salt and pepper lightly and fry chicken until it is cooked through. Remove from frying pan.
3.) Add onion to the fat in the pan, adding a splash of olive oil if pan is running dry. Sauté onion until it is just soft.
4.) Add the can of condensed tomato soup then fill can with water and add this to the pan, as well.
5.) Add the soy milk to the pan and stir well. Bring to a simmer.
6.) Add the Parmesan cheese, parsley, fresh gnocchi, and cooked bacon and chicken. Stir well and simmer for 5 minutes until gnocchi is slightly puffed and cooked through and the rest of the dish is hot.
Smash burgers are nothing new. They have been around for a long time and recently, they have become particularly trendy. There’s a food truck just down the road from us that makes great smash burgers, but I don’t think I had ever made them until now. And I will say, I think they’re now my go-to when I want burgers for dinner. Not only are they delicious, but they are also much easier and faster to make than regular burgers.
Now, I realize that traditionally, a hefty handful of very thinly sliced onions is placed down onto the griddle before a ball of ground meat is smashed down into them. We have very different palettes sitting around our table, though, and not everyone loves the idea of grilled onions. While those people are crazy, they still deserve to have smash burgers the way they like them. I just served red onion on the side with all the other toppings and everyone was very happy.
Ingredients:
2 pounds of regular or medium ground beef (avoid lean meat for this one, if you can)
2 eggs
Salt, to taste
Freshly ground black pepper, to taste
As much thinly sliced cheddar cheese as you would like (optional)
8 hamburger buns
Toppings of choice (lettuce, tomato, red onion, bacon, mayonnaise, ketchup, and mustard, to name a few)
Directions:
1.) Place ground beef in a large bowl and add eggs, salt, and pepper. Gently mix just until all ingredients are incorporated, being sure not to over-mix.
2.) Weigh out 4.5 ounces of beef and shape into a ball. Place on a baking sheet and continue with the rest of the meat.
3.) Place baking sheet into the fridge and let meat rest for at least half an hour.
4.) Spray a griddle with non-stick spray and heat to medium-high. You can also do this in a frying pan. I just think it’s easier to do it on a griddle.
5.) Once griddle just starts to smoke, place the balls of meat on it, making sure they are evenly spaced. Place a small piece of parchment on one ball of meat and press down using a burger press or the bottom of a pot, thereby smashing the burger onto the griddle. Repeat with remaining balls of meat.
6.) Cook meat for approximately three minutes on the first side. Then, flip. If you are using cheese, place it onto the burgers now. Cook the other side for another three minutes.
7.) Remove patties to a platter and serve alongside buns and toppings.
At this time last year, Brent and I were fortunate enough to visit Jamaica. There were way too many good things packed into that vacation to mention here. I challenged myself by going snorkeling (I’m not the strongest swimmer,) I dipped my toes into the Caribbean Sea for the first time, and we made a ton of great memories.
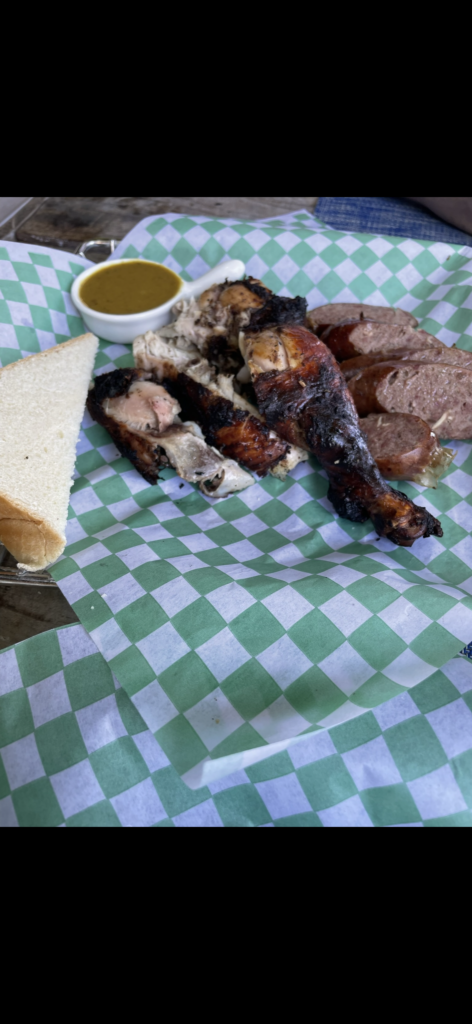
When people find out that we stayed on a resort (thank you, Sandals Ochi!) one of the first things they want to hear about is the food. It was great! Was all of it 5-star or Michelin Star worthy? No. Some of it was, definitely. But the best meals didn’t come from the fancy restaurants. The best meals were the poolside pizza and everything that came from The Jerk Shack (chicken, pork, and sausages). Not exactly Michelin Star, but some of the best in my books.
Once we were back at home, I tried many pre-made jerk mixes trying to get that taste back. Unfortunately, none of them came close. This recipe, though, takes me right back to that beach and is full of all the flavours I so vividly remember.
I wish I could go back to Jamaica again and again and again, but reality does call. Still, this Caribbean recipe lets me do it right here in our Canadian home any time I want. And for that, I’m very happy. So, this one is dedicated to Jamaica and all of the beautiful, friendly people there. Thank you all for giving me one of the best times of my life! Yahman!
Ingredients for the chicken:
1 medium onion, coarsely chopped
3 medium green onions, coarsely chopped
3 Scotch bonnet chiles, chopped
3 garlic cloves, chopped
1 tablespoon five-spice powder
1 tablespoon allspice
1 tablespoon coarsely ground black pepper
1 teaspoon dried thyme
1 teaspoon nutmeg, freshly grated
1 teaspoon kosher sale
1/2 cup soy sauce
2 tablespoons vegetable oil
10 chicken drumstick
Ingredients for the rice and peas:
3 tablespoons unsalted butter
3 cloves garlic, finely minced
1 small onion, finely chopped
1 teaspoon dried thyme
1 teaspoon allspice
1 large fresh bay leaf
1 Scotch bonnet chili
1 19-ounce can red kidney beans, rinsed and drained
1 400-ml can coconut milk
1 cup water
1 teaspoon salt
2 cups long grain white rice
Directions:
1.) Make the marinade for the chicken. Combine the onion, green onions, Scotch bonnets, garlic, five spice, allspice, pepper, thyme, nutmeg, and salt in a food processor. Process until the mixture is coarse. Combine the soy sauce and oil in a measuring glass and in a slow, steady stream, pour into food processor while it’s running until you have a thick marinade. Place chicken drumsticks into a large resealable bag and pour marinade over top. Massage slightly to make sure marinade entirely covers chicken. Marinade for at least six hours, and up to overnight.
2.) When ready to start cooking, begin with the rice. Preheat oven to 400 degrees Fahrenheit.
3.) In a large ovenproof pot, melt butter over medium-high heat. Add onion and sweat it lightly until it is translucent. Add garlic, thyme, allspice, bay leaf, and whole Scotch bonnet. Cook for 30 seconds while stirring.
4.) Add coconut milk, water, kidney beans, and rice and stir. Once bubbles start forming at the surface, cover and place in the oven. Bake for 40 minutes.
5.) Line a baking sheet with aluminum foil for easy cleanup. Spray foil with non-stick spray. Remove chicken from marinade and place drumsticks on the baking sheet, with plenty of space between them. Brush additional marinade onto drumsticks to make sure they are fully coated. Place chicken into the oven and cook for 45 – 60 minutes, until the chicken registers 170 Fahrenheit on a meat thermometer.
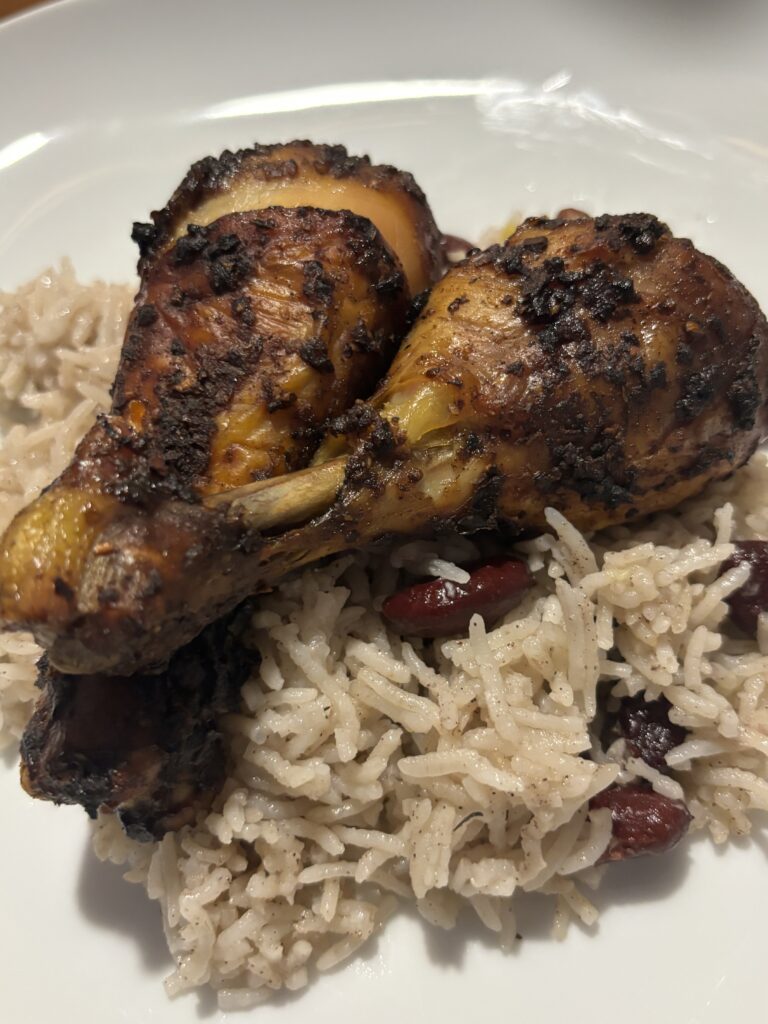
6.) When rice is finished in the oven, remove it but keep the lid on. Allow rice to sit for 15 minutes before removing the lid and fluffing with a fork. Your chicken should be ready at about the same time.
7.) Serve the chicken and rice together, and enjoy!
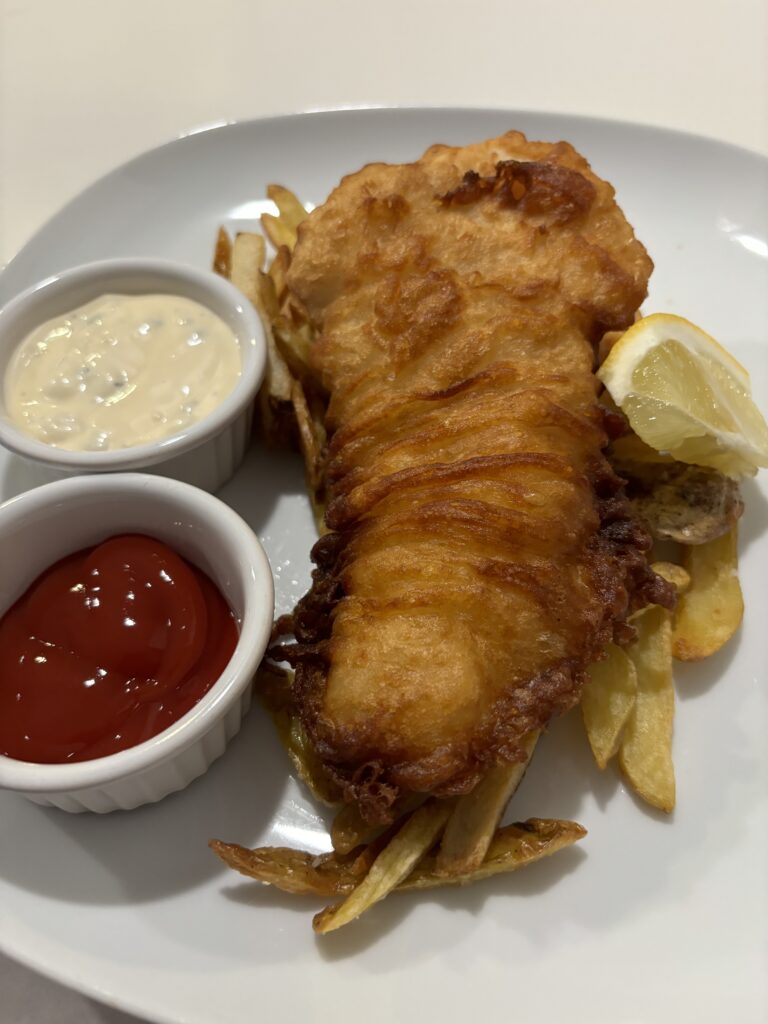
I feel like so much of my life is spent trying to find substitutions for ingredients. It’s because I get a meal idea in my head and nothing else will do. Not having the usual ingredients is not going to stop me from making what I want to eat, and that’s what happened with this recipe. I was craving fish and chips but didn’t have any beer in the house. Once again not to be deterred, a can of Ginger Ale in the fridge caught my eye and I knew what to do. This recipe is the exact same fish recipe I already have on the site, but with the beer swapped for Ginger Ale.
While the fish is good, it’s not the hero of this story. That title belongs to the tartar sauce, and you’ll love dunking your crispy fillets into this one.
1.) Cook French fries according to package directions, or keep homemade fries warm in the oven while you make the fish.
2.) Thoroughly combine all ingredients for the tartar sauce. Place bowl in fridge until ready to serve.
3.) Mix 1 cup of flour and 1 teaspoon of salt in a shallow dish and set aside. Fill a Dutch oven or other heavy pot halfway with vegetable oil. Turn heat to medium or medium-high and let it preheat to about 350 degrees Fahrenheit while preparing batter.
4.) In a large bowl combine 2 cups of all-purpose flour, baking powder and salt. Add the Ginger Ale and lemon juice and whisk to incorporate all ingredients.
5.) When ready to start frying, place haddock fillets, one by one, into the plate of flour. Turn to ensure that the entire piece of fish is coated. Shake off excess flour and dip the fish into the beer batter. Remove from the batter and allow excess to drip off.
6.) Slowly place the fish into the hot oil, moving the end piece in the oil a bit as you do. This will prevent it from falling to the bottom of the pot and sticking. Fry for 2 minutes on one side then flip and fry for another 1 – 2 minutes, just until the fish is entirely cooked through. Drain excess oil by laying the fillet on paper towels. Repeat with remaining haddock fillets.
7.) Garnish with lemon slices, tartar sauce, and French fries.
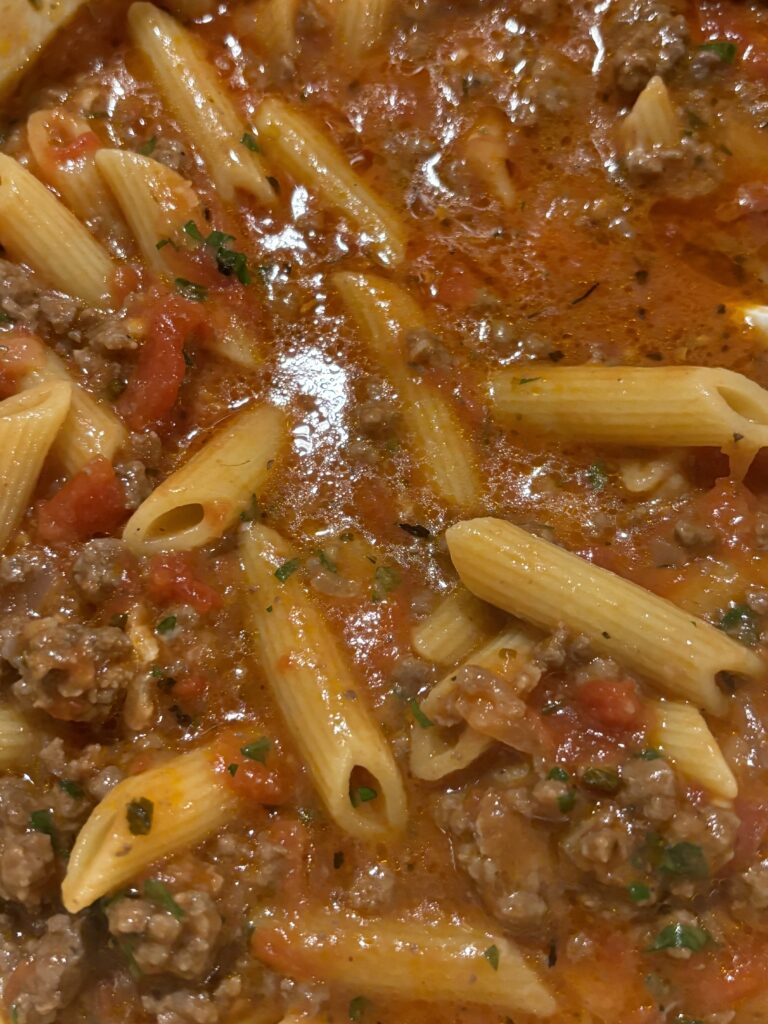
I was reluctant to publish this post because to me, it’s not the prettiest meal. But it’s a meal my family eats about once a week, and you know why? Because about once a week, I’m overwhelmed. There are too many clients demanding too many things. There are too many meals to cook. Do we really need all these bathrooms that just get dirty? Why are there so many stairs to vacuum? How is the living room dusty again? Why is there laundry everywhere? Didn’t I just sweep? It’s the normal, little things that all add up and at times, it seems like a lot.
Don’t get me wrong. I love my life and I wouldn’t change a single thing. And I’m very grateful that we have too many bathrooms and stairs. But sometimes, we all feel overwhelmed. Sometimes, we just don’t have it in us to put a beautiful meal on the table that took three hours to cook. All we can do is offer food that is simple, easy to bring together, and that doesn’t take too much more of our time.
But even when it’s ugly, it can still nourish our soul. It can still bring us together around the table and remind us that we can face the overwhelm together. And that’s what this one does for my family, even if it’s not the prettiest meal. So, if you’ve ever had a day (and who hasn’t?) this meal may just make it a little better.
Ingredients:
1 tablespoon butter
1 pound medium ground beef
1 onion, diced
3 cloves of garlic, minced
1 tablespoon each of fresh rosemary, thyme, and oregano, chopped
2 cups whole canned tomatoes (I have recently fallen in love with Mutti’s line of products)
2 cups chicken, beef, or vegetable broth
8 ounces of penne, or any short pasta
1 cup fresh mozzarella cheese, shredded
2 tablespoons fresh basil, chopped
Salt and pepper, to taste
Directions:
1.) Place butter in a frying pan over medium heat and melt. Add ground beef, breaking it up as you do. Season with salt and pepper and fry until ground beef is no longer pink, 8 to 10 minutes.
2.) Add onion and cook for about 3 minutes, until translucent. Add garlic and fresh herbs, except basil, and cook for three more minutes. This blooms the fresh herbs in the fat, flavoring the dish throughout.
3.) Add the whole canned tomatoes, breaking them up as you do using a wooden spoon or your hands. Add the stock and the penne. Season with more salt and pepper to taste and stir.
4.) Bring the mixture to a boil over high heat. Lower heat to medium-low and simmer for 15 – 20 minutes until the pasta is tender. The consistency of your sauce will depend entirely on the type and brand of ingredients you are using. If the sauce becomes too loose, turn heat up to reduce it faster. If it becomes too tight, add more water.
5.) When pasta is tender, remove the entire pan from the heat. Add shredded mozzarella and basil and stir.
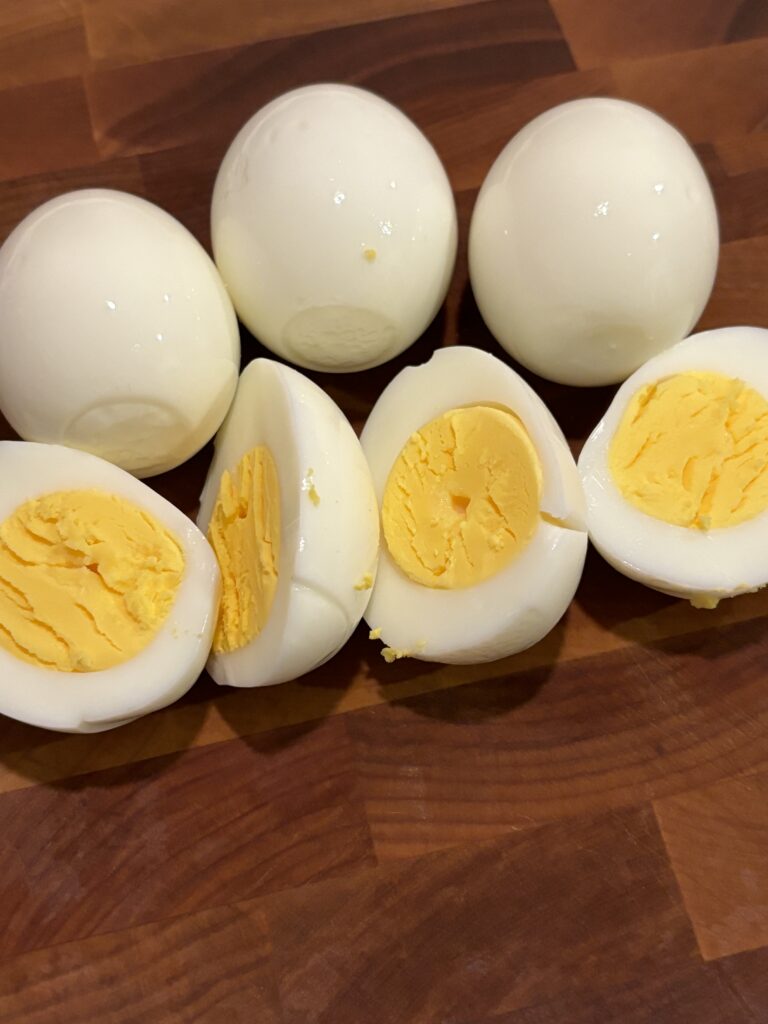
During my brief flirtation with vegetarianism, there were a couple of reasons why I knew I couldn’t go full-fledged vegan. Eggs were one of the biggest. I love eggs in all of their forms and can’t imagine my diet without them.
Although I cracked the code on properly hard-boiling eggs some years ago, I still could never seem to peel them effectively. To end up with 3 or 5 eggs, I’d have to boil 6 or 7 because so much of the actual egg would come off with the shell (and stubbornly refuse to let go.) I was left with sad-looking ingredients that resembled eggs but with large pieces missing. Now, thankfully, I’ve cracked the code on cooking perfectly hard-boiled eggs and peeling them while keeping them intact.
I know everyone has their own specific way to boil eggs. I promise you, this is the only one I will ever use again. After figuring out some of the secrets, and using this method many times since, it hasn’t let me down yet. It won’t let you down, either.
Ingredients:
As many eggs as you would like (between 6 – 12 is a good number for a pot)
Directions:
1.) Keep your eggs in the fridge and fill a medium to large-sized pot with water. Bring to a boil. It is important to keep your eggs cold until ready to cook. If you place them in the water and then bring to a boil, the membrane inside will slowly cook and firmly attach itself to the white of the egg.
2.) When water is boiling, slowly lower the eggs in using a slotted spoon. Set a timer for 13 minutes.
3.) Gently drain eggs after 13 minutes. Run cold water over them. If possible, place them in a bowl and completely cover with ice. Leave for 15 minutes. If you do not have that much ice, you can use a mixture of ice and water or continue to run cold water over the cooked eggs.
4.) When eggs have completely cooled, lightly tap one against the countertop in several places. Under running cold water, gently peel the eggs. Rinse of any remaining shell pieces, set aside, and repeat with remaining eggs.
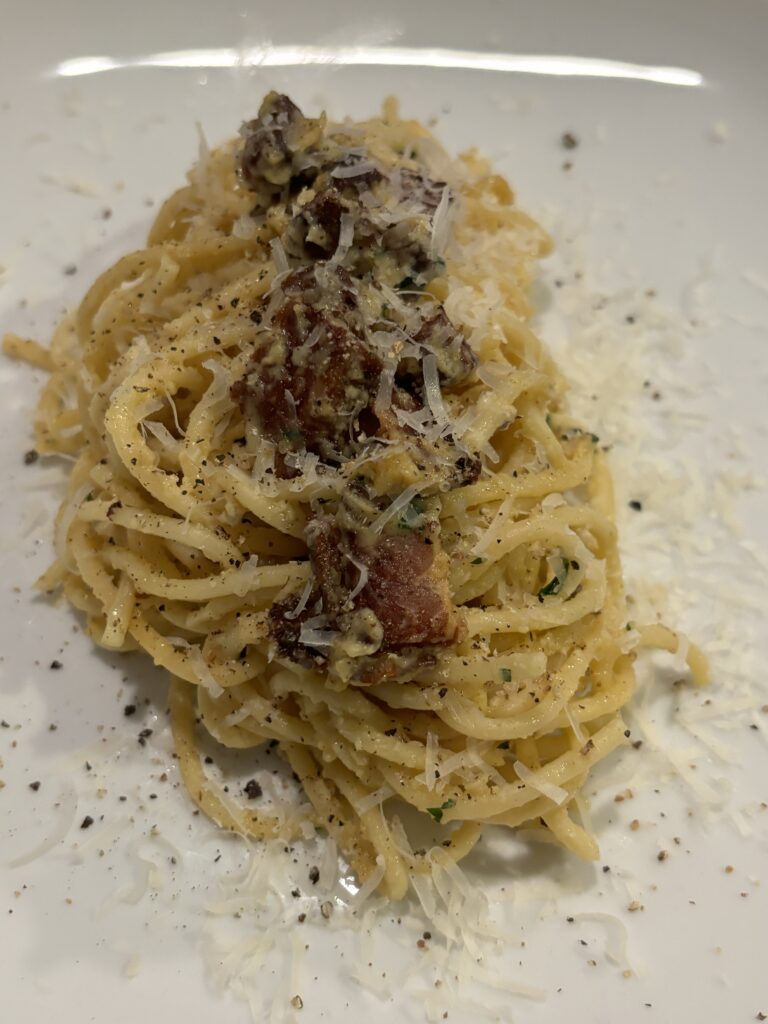
I love food with a story behind it, and spaghetti carbonara has one of the best. Because the term ‘carbonara’ translates to ‘coal burner,’ it is thought that the name came from workers in the coal mines in Italy. When these workers would come home for a hearty dinner after a hard day’s work, it’s said that bits of coal would fall from their shirts and onto their plates, actually giving the dish its flavor. Going with this theory shows why the dish is often finished with so much black pepper (which is one of the things I love about it the most.)
While today, many people use bucatini, fettuccine, and even (gasp!) bow-tie pasta, spaghetti is most traditional. Conventionally, guanciale is the meat that is used, but it’s very hard to find in my part of the world. I use pancetta or bacon in its place and having small amounts of each when I made it, I used a combination this time. Whatever ingredients you use to make it yours, it’s sure to be one you keep coming back to.
Ingredients:
1 and 1/2 cups of chopped pancetta and bacon
1/2 cup fresh pecorino cheese, grated
1/2 cup fresh parmesan cheese, grated
3 large eggs
12 ounces of spaghetti
2 cloves of garlic, thinly sliced
3 tablespoons of butter
3 tablespoons fresh parsley, chopped
Sea salt, to taste
Plenty of freshly ground black pepper
Directions:
1.) Fill a large saucepan with water and bring to a boil. Mix the pecorino and parmesan cheeses together.
2.) Beat the eggs in a medium-sized bowl until they are smooth. Season with a bit of freshly ground pepper and set aside.
3.) When water is boiling, salt lightly and add spaghetti. Do not add too much salt, as there is plenty in the meat and cheese. Cook for one minute less than the package instructions, stirring regularly.
4.) As the spaghetti cooks, place pancetta and bacon in a large pan until crips. Use a slotted spoon to remove to a plate lined with a paper towel.
5.) Lower the heat under the pan and add the butter. When butter has melted, add sliced garlic. Cook for 30 seconds, or until the garlic just becomes tender.
6.) Using tongs, lift spaghetti from the boiling water and place directly in the pan. It’s okay if drops of water fall in. You will need even more later. Turns the spaghetti in the fat so it is fully coated.
7.) Whisk 3/4 of the cheese mixture into the beaten eggs. Turn the heat off under the pan and add the cheese and egg mixture. Turn spaghetti quickly in it so it becomes coated but does not turn into scrambled eggs. Add 1/4 to 1/2 cup of pasta water to bring it to saucy and creamy texture.
8.) Add fresh parsley, more freshly ground black pepper, and salt if needed, and give it a final stir.
9.) Serve with remaining grated cheese, more freshly ground pepper if desired, and enjoy!
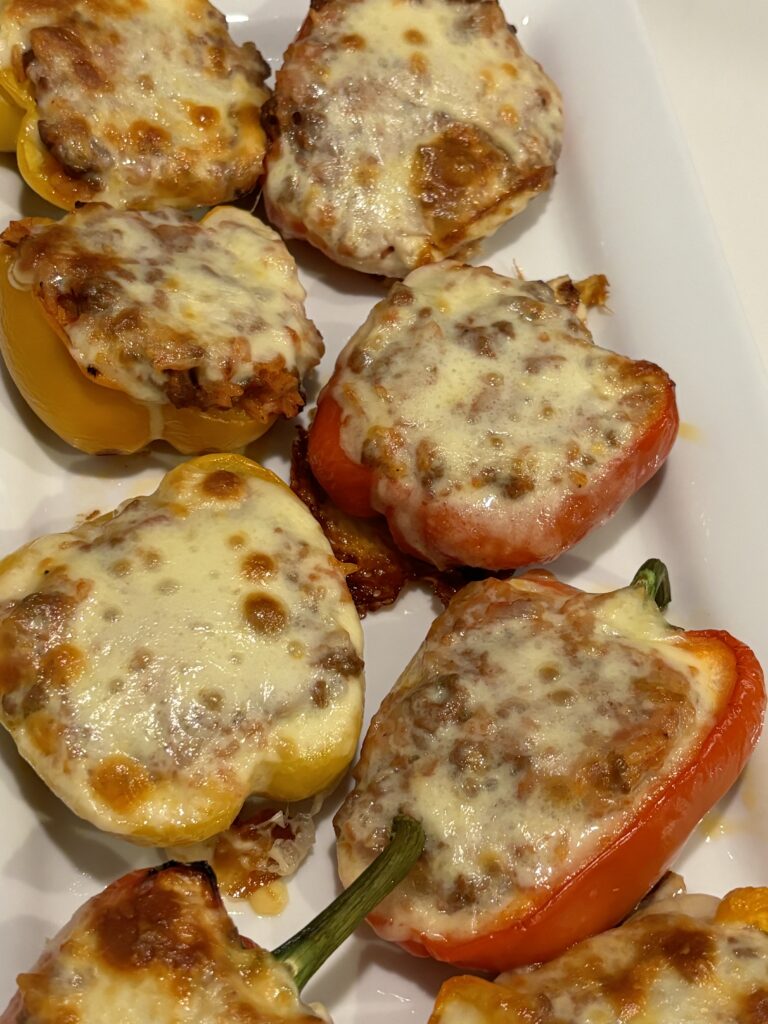
One of the biggest benefits of changing the site up was that I got to review every single blog post. Many of the memories made me chuckle, but I also questioned many of the photographs I took along the way. With these latter posts, I decided to not just take another pic, but to recreate the entire recipe. Now, not only do I have better food pics, but I also get to revisit some of my favorite recipes, such as these stuffed peppers.
These peppers are a meal that Paige gets excited about, which is no easy feat. So, they’re already a winner in my book. I like to make them after a night when we’ve had rice, so that I can simply use the leftovers here. Also, and this is important. I do not recommend using pre-shredded cheese. Buy the fresh mozzarella balls and slice them to place on top of the peppers. The difference is everything and takes an old comfort food up another level.
Ingredients:
1 pound ground beef
3 large yellow, red, or orange peppers
3 tablespoons olive oil
2 shallots, finely chopped
3 cloves garlic, minced
2 teaspoons chili powder
1 teaspoon ground cumin
1 teaspoon dried oregano
8 ounces of tomato sauce
1 cup cooked rice
2 fresh mozzarella balls, sliced as thinly or as thickly as you would like
Directions:
1.) Preheat the oven to 425 degrees Fahrenheit. Slice each pepper lengthwise in the middle and remove the seeds and ribs.
2.) Line a baking sheet with aluminum foil or parchment paper.
3.) Drizzle a bit of olive oil in each pepper and brush to coat the inside. Sprinkle the inside of each pepper with salt.
4.) Place the peppers, cut-side up, in the oven and roast for about 20 minutes, until the peppers are tender-crisp and slightly browned.
5.) Heat approximately two tablespoons of olive oil in a large skillet. Add the ground beef and break up with a spoon. Season well with salt and pepper and cook until the beef is nearly browned.
6.) Add the shallots and cook until soft and translucent, about 3 minutes, stirring regularly.
7.) Add the garlic to the beef along with the chili powder, oregano, and cumin. Cook for about 30 seconds to one minute, until fragrant.
8.) Add the tomato sauce and bring to a boil. Add the rice and stir well.
9.) Remove peppers from the oven and equally divide the meat mixture among them, stuffing it inside of each.
10.) Lay one or two slices of mozzarella on top of peppers, depending on how much you would like. Place the peppers back into the hot oven for 10 to 15 minutes, until the meat mixture is bubbling and the cheese has melted.