Originally November 7, 2017
There’s a reason you’ll never see a shellfish recipe on this site. I’m highly allergic, and I’m also very paranoid about my allergy (given that it could kill me and all). And while I usually get by okay with my allergy, it does keep me from going to certain places; namely, Chinese restaurants. There’s just too much of it strewn around and even if the kitchen is very careful not to cross-contaminate, I just can’t fully trust that they haven’t overlooked oyster sauce or fish sauce in one of their dishes. And even that little bit could quite literally have fatal consequences for me.
But I love Chinese food, and sometimes I miss it (in my younger days, I was a bit more cavalier about my allergy). So when a craving strikes, I have no problem whipping up a huge feast of egg rolls, chow mein, and other Chinese food goodies for me and my family. And when I do it, my family and I still have tons of leftovers, just as if we had ordered enough for 20 people. I mean, if I’m going to do it, I’m going to make sure my freezer’s stocked too.
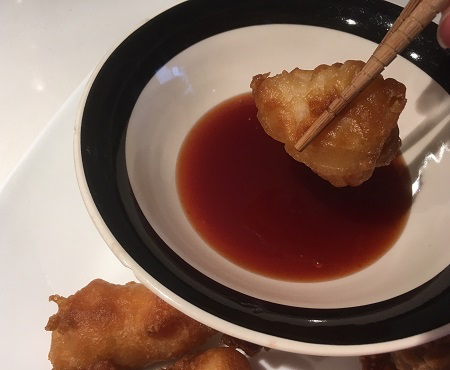
Last week, that craving did strike and I made the usual fare, with one exception. For the first time ever, I made Chinese chicken balls and man, they were good. I was most looking forward to the chow mein, but it was really the chicken balls that stole the show. And everyone agreed that they were the best part of the meal. Sadly, I only have four left in my freezer. They are delicious though, and much easier to make than I thought they would be.
I even made the classic sweet and sour sauce to go along with them, but I warn you. This does not look anything like the sweet and sour sauce you’ll get at your favourite Chinese restaurant. Probably because I didn’t put a ton of red food colouring in it. But although it doesn’t look like the sauce, it definitely still tastes like it. And it can simmer on the stove while you fry the chicken balls, or be made ahead of time for those that like it cooled a bit before they start dipping. Whatever way you choose to go, it’s all so good. These are definitely going to show up on the table the next time my Chinese food craving strikes!
Ingredients for the sweet and sour sauce:
- 1/2 cup ketchup
- 1 teaspoon soy sauce
- 1/3 cup white vinegar
- 1/2 cup brown sugar
- 1 cup white sugar
- 3/4 cup cold water
- 4 tablespoons corn starch
Ingredients for the chicken balls:
- 1 cup all-purpose flour
- 1 cup cornstarch
- 2 teaspoons baking powder
- 2 teaspoons baking soda
- 1 teaspoon salt
- 1 1/3 cup cold water
- 2 teaspoons sesame oil
- 4 chicken breasts, cut into bite-sized pieces
- Oil, for deep-frying
Directions:
1.) To make the sweet and sour sauce, combine the ketchup, soy sauce, white vinegar, brown sugar, and white sugar in a small saucepan. In a cup or bowl whisk the cold water with the cornstarch until smooth. Whisk the cornstarch mixture vigorously into the ketchup mixture. Bring to a boil over medium-high heat. Reduce the heat to medium-low and whisk constantly until the sauce has thickened to the desired consistency (it should be very thick).
2.) To make the chicken balls, combine the flour, cornstarch, salt, baking powder, and baking soda in a large bowl. Add in water and sesame oil and stir well to fully combine, being sure to scrape up from the bottom of the bowl to get any flour and cornstarch that may have settled. Continue stirring until the entire mixture is smooth.
3.) Add the chicken pieces to the flour and cornstarch mixture and stir well again to ensure all pieces are coated in the batter.
4.) Using a deep-fryer or a deep Dutch oven, heat oil over medium-high heat until it reaches 375 degrees Fahrenheit.
5.) Frying a few pieces at a time, remove the chicken from the batter, ensuring it is still completely covered in batter, and gently drop into the hot oil. Fry for 3-4 minutes until all of the chicken balls are golden brown. Remove using a slotted spoon, drain on paper towels, and season with salt, if desired. Repeat with remaining pieces of chicken. If any of the chicken balls start to cool after being cooked while you fry the remaining chicken balls, place them in a 300 degree oven and they’ll stay warm and crisp.
6.) Serve the chicken balls with the sweet and sour sauce on the side for dipping, and enjoy!