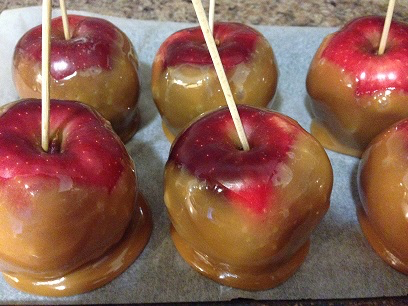
I know, I know. Halloween is over, so why am I posting a recipe for caramel apples on New Year’s Day? Because today is also Apple Gifting Day. I don’t know the origin behind this food holiday, and a quick Google search only told me about the “12 Days of Christmas” that had Apple the company giving out freebies (wish I’d known about that a bit sooner.) But if I were to receive an apple as a gift today, I’d like to receive it in the form of a caramel apple. And if you want to give the gift of an apple today, these are really easy to make. In fact, they’re so easy, I feel kind of bad even calling this a recipe.
Ingredients:
1 pound (probably about 25 to 30) individually wrapped caramels, unwrapped 6 apples of any red variety 2 tablespoons milk 3 bamboo skewers
Directions:
1.) Scrub apples thoroughly and make sure they are completely dry. Cut bamboo skewers in half, snipping off the sharp end.
2.) Place caramels and milk in a medium saucepan over medium heat. Stir constantly until the caramels are fully melted and combined with the milk. This will take a few minutes; be patient. The caramel will soften and melt.
3.) Place one bamboo skewer into the bottom of each apple (the place where you can see the tip of the core.) Tilt the saucepan so that the caramel pools over onto one side, then roll one apple around in it, until it is completely coated. If the caramel is not thick enough it will not stick to the apple entirely, so add more caramels if you find that’s happening with yours.
4.) Place the apple on a baking sheet covered with parchment paper and place in the fridge for 15 minutes. This will help the caramel firm up and set. Don’t let the apples touch each other, or the caramel will peel off one, and onto the other.
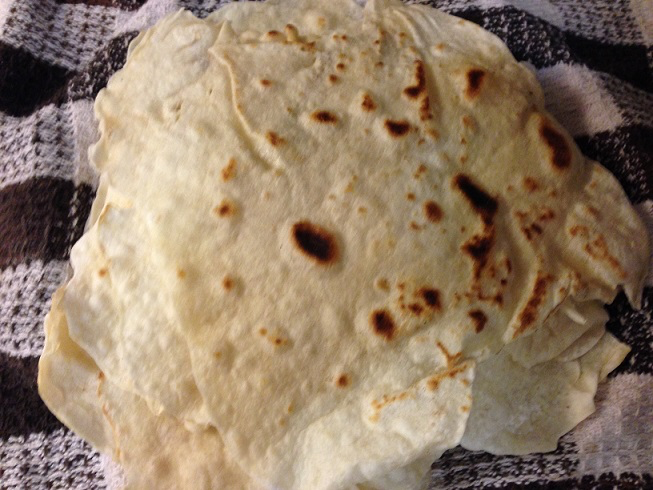
This was one of those recipes that was born from necessity. I didn’t have any bread in the house, but I needed something for the girls’ lunches – and there was no time to go shopping to pick up more. I could have just made my go-to sourdough bread, but why not try my hand at wraps if I’m actually going to make something? After all, I love new things to try in the kitchen, and I love a challenge. Turns out, I only got one of those with these, as they were super easy to make! The recipe I used said that if you’re “not used to making these,” you should have two people – one to cook them while one rolls the other out. Well, it was me by my lonesome, but I thought, ‘Really? Do I need two people?’ Nope! Just start by rolling a couple out so they’re ready to hit that pan, and then continue rolling as you go. If you do think you’re getting behind, just move the pan off the heat so the dough doesn’t burn as soon as it hits. Trust me, the cast iron (and yes, you really should use a cast-iron) will still be piping hot for the minute it will take you to roll out more.
Ingredients:
3 cups all-purpose flour 2 teaspoons baking powder 1 teaspoon salt 4 – 6 tablespoons lard or vegetable shortening 1 1/4 cups warm water (approximately)
Directions:
1.) In a food processor blend together the flour, baking powder, and salt. Blend until the ingredients are just combined and then remove the lid and pinch some together with your fingertips. If the ingredients hold their shape when squeezed slightly, it’s perfect. If the mixture crumbles even after pinching, you either don’t have enough shortening or it’s not mixed together well. If it forms a hard clump, you need less shortening – it’s really hard to get out of there though, so just add a bit more flour to fix the ratio.
2.) Replace the lid onto the processor and then add the water all at once. Mix the dough quickly once the water has been added.
3.) Dump the contents of the processor into a large bowl, moving it around the sides of the processor to pick up any excess flour as you do. Once in the bowl, knead it by folding it and pushing it down, and then folding again about twelve times, or until the dough is soft and no longer sticky.
4.) Cover the bowl and allow it to rest for about 10 minutes. This step is important, as it will let any excess flour absorb back into the dough, which will give you a softer tortilla after cooking.
5.) Once your dough has rested, begin pinching off small balls that are about 1 inch in diameter. Knead each of these balls just by placing them in one palm, folding it over with your fingers, and repeating until it’s in the shape of a flat disk. Place it to one side of the bowl, or on a generously floured surface and repeat with the remaining dough.
6.) When the entire large bowl of dough has been pinched off into smaller balls, cover the small balls with a tea towel and allow to rest for another 10 minutes. This will make them easier to roll.
7.) On a well-floured surface, roll out the small balls into tortillas. To keep a round shape, roll once, turn 1/4 of a turn, roll again, and repeat until the entire ball has been rolled. Don’t worry if they’re not completely round; homemade often means rustic-looking, after all!
8.) Heat a cast iron skillet on top of the stove at medium-high heat. Let it get really piping hot! Lightly drizzle a bit of canola oil over it and wipe the surface thoroughly with a paper towel so they don’t stick.
9.) Place one rolled tortilla onto the cast iron skillet and cook for just about 30 seconds. Don’t let it burn or you’ll have to wash the skillet and start all over again. Admire the beauty of it as it puffs up and starts to become a bona fide tortilla right before your eyes! Then flip and cook for another 30 seconds.
10.) When one tortilla is finished cooking, remove it from the heat right away and wrap it in a tea towel to keep warm. Start cooking another tortilla, placing it right on top of the other when other and re-wrapping in the towel. Don’t worry about the finished tortillas sticking to each other like I did – they won’t!
11.) Serve as soft tacos, sandwich wraps, tortilla chips (when fried,) or anything else you’d like, and enjoy!
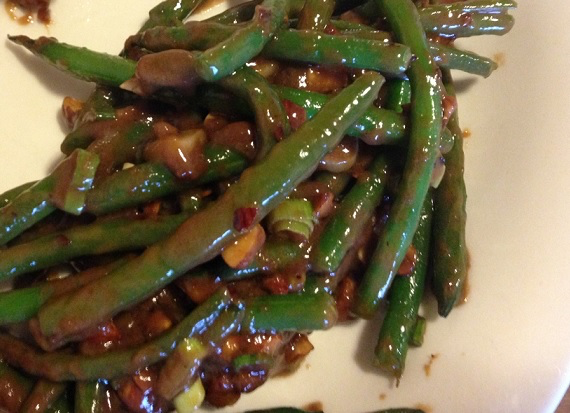
I saw Gordon Ramsay cook this dish on his Food Network show, “Gordon Ramsay’s Ultimate Home Cooking.” (Don’t have the app yet, as I’m waiting for a reason to spend $6.99 on such a thing, but it is available in the App Store.) I was intrigued that someone combined my favourite vegetable of all time with peanut butter, and wondered how it tasted. The answer? Delightful. OMG, it was so good!!! He used toasted sesame seeds to top his but, being fresh out, I opted for almonds instead. They still gave the intended crunch and texture to the dish, and tasted mighty fine too, I have to add. This is one I’ll be coming back to again and again, I’m sure.
Ingredients:
1 pound green beans, trimmed 2 tablespoons butter 2 tablespoons smooth peanut butter 1 tablespoon soy sauce 1 tablespoon rice vinegar 2 green onions, sliced 1/2 cup almonds, roughly chopped
Directions:
1.) Place green beans in a large skillet and cover completely with water. Cover, bring to a boil and cook until beans are almost done, just shy of tender.
2.) Meanwhile, place chopped almonds in a separate skillet over medium heat and toast, shaking the pan or turning the nuts regularly to keep them from burning. Just as the nuts begin to brown, remove them from the heat.
3.) Combine peanut butter, soy sauce, green onions, and rice vinegar in a bowl and set aside.
4.) When beans are finished cooking, drain them in a colander, giving the skillet a quick wipe if needed. Place the pan back over medium heat and melt two tablespoons of butter inside. When butter is melted, return beans to the pan. Pour in the peanut butter sauce and cook, stirring to coat the beans entirely in the sauce. Cook for just a minute or two, until the entire mixture is completely warmed through.
5.) Remove the green beans from the heat, transfer to a serving dish, and top with toasted almonds.
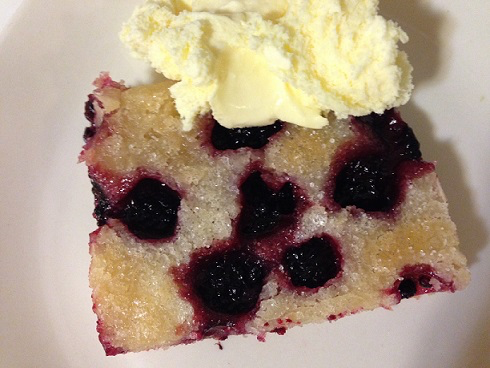
My grandmother grows blackberries because of all the health benefits they hold within them. And she grows lots of blackberries. Each summer her plants blossom in all their glory, and she spends a great deal of time talking about the time it takes to just pick the darned things. The plants are beautiful, and my grandma has much more than she could ever do with them each year. There’s just one problem. My grandma doesn’t like blackberries. She finds them too seedy and just not tasty enough to be worthwhile. So she sprinkles what she needs to reap those health benefits onto ice cream, and gives much of the rest away to family (namely, me, my sister, and my mom.)
But there’s a problem with that, too. No one in my family except for my daughter Paige is that crazy about blackberries; and we don’t often know what to do with the abundance we have. So, we’re constantly looking for things to do with them. So far I’ve found my Poisoned Blackberry Cocktail, and now Ree Drummond’s Blackberry Cobbler. This one’s so super easy, and I can’t thank The Pioneer Woman enough for showing it to me.
Ingredients:
1/2 cup butter, melted 1 cup sugar, plus 1/4 cup 1 cup flour 1 cup milk 2 cups blackberries (doesn’t matter if they’re frozen or fresh)
Directions:
1.) Butter a round or square 9″ baking dish and preheat the oven to 350 degrees Fahrenheit.
2.) In a large mixing bowl combine 1 cup of the sugar and all of the flour in a mixing bowl. Whisk in the milk until all ingredients are thoroughly combined. Add melted butter and mix once again.
3.) Rinse the blackberries and pat them dry.
4.) Pour the batter into the buttered baking dish and sprinkle blackberries right over top. Sprinkle on the 1.4 cup of sugar.
5.) Place in the preheated oven and bake for 1 hour, until the cobbler is golden and bubbly. To make it extra crunchy on top, sprinkle on an extra tablespoon of sugar over the entire cobbler 10 minutes before the cobbler is finished.
6.) Remove from oven, allow to cool for just a few minutes, and then scoop it into bowls or cut into squares.
Did you know that today is National Tempura Day? I tell ya, it’s getting hard to keep up with all of these food holidays, with one landing on nearly every single day of the year. Best to just find the ones you really love and celebrate those alone, I find. Luckily, this is one of them. I’ve only made tempura twice, but it went off without a hitch each time. It’s pretty easy and to tell you the truth, I don’t know what all the fuss is about. Whip up a simple batter, plunge your food into it and then let it fry, baby! Just remember that all of your ingredients need to be at room temperature when mixing, and then chill everything until you’re ready to cook, as the batter especially needs to be cold, cold, cold in order to work out. It’s so good it’s worth the wait, and you can use this same batter with just about any vegetable, shrimp, and chicken too. Whatever you use, it makes an especially good addition when you’re having your own Chinese night, making sweet n’ sour chicken, or fried rice!
Ingredients:
1 egg yolk 1 cup water 3/4 cup all-purpose flour 1/4 cup cornstarch, plus 2 tablespoons 1 1/2 pounds green beans, washed and trimmed
Directions:
1.) Preheat a deep fryer to 340 degrees Fahrenheit.
2.) Beat egg yolk and water together in a large bowl until they are thoroughly combined. Stir in the flour and cornstarch (very quickly) and stir only until the two are combined. Don’t worry about it if there are a few lumps in it. Chill batter in the fridge for 30 minutes.
3.) Working in batches so you don’t overcrowd the deep-fryer, quickly dip the green beans into the batter and then, using tongs, place them down into the deep-fryer. Cook until the beans are crisp and golden brown, which should take 1 to 2 minutes. When the beans are finished cooking, use a slotted spoon to take them out of the oil and then drain on paper towels.
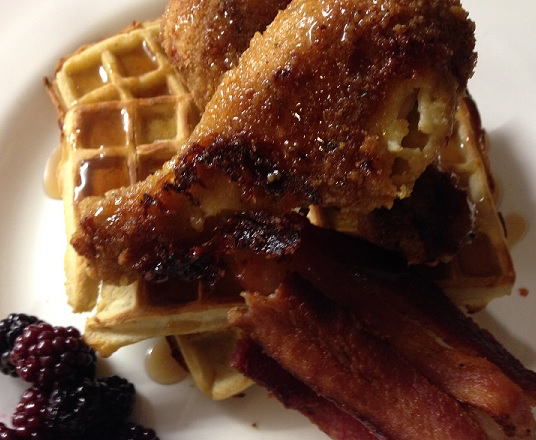
Who ever first thought up Chicken and Waffles? I just heard of this food a few years ago and at first I have to admit, the thought of it didn’t do much for me. I mean really, chicken and waffles? But as I’ve watched more and more people make it, and more and more rave about it, it started getting to me. Surely all those people can’t be wrong. And ya know what? They’re not. Chicken and waffles is an outstanding dish, and because it’s a little sweet and a little salty, and a little bit breakfast, a little bit dinner, you can pair it with just about anything you choose. I highly recommend blackberries, not just because I’m always looking for places to stash them into, but also because the sour taste just gives you more element to the dish. I also threw some bacon on the plate to make it more appetizing for Brent (which wasn’t necessary – he loved the chicken and waffles!) However you eat it though, this is one that’s become famous for a reason. And if you’re hesitant, as I was, just trust me on this one.
Ingredients:
12 chicken drumsticks 1 1/2 cups all-purpose flour 1/2 cup cornstarch 3 large eggs 2 cups bread crumbs 1/2 cup freshly grated Parmesan cheese 3 tablespoons garlic powder 3 tablespoons paprika 3 tablespoons mustard powder 1 tablespoon chili powder 4 tablespoons olive oil Salt and pepper 8 fresh or frozen waffles
Directions:
1.) Preheat oven to 400 degrees Fahrenheit.
2.) Place flour and cornstarch in a large bowl, season with salt and pepper, and mix. In a separate bowl, beat eggs lightly. In a third bowl, place breadcrumbs, Parmesan cheese, garlic powder, paprika, mustard powder, and chili powder. Mix thoroughly.
3.) One by one, coat drumsticks in flour and cornstarch mixture and shake off excess. Dip into egg mixture, and then immediately into bread crumb mixture, making sure to coat thoroughly after each coat, and to shake off all excess.
4.) When all drumsticks are breaded, place onto a greased baking sheet and drizzle with olive oil. Bake in preheated oven for about 1 hour, turning halfway through cooking, until chicken is crunchy on the outside, and a deep golden brown.
5.) After chicken is finished cooking, take out of oven and let rest for about 10 minuets, covered if you choose.
6.) While chicken is resting, make waffles either with a fresh batter, or from frozen.
7.) Plate waffles on individual plates when finished, place chicken on top, and drizzle entire bit with maple syrup.
Braised short ribs are one of those dishes I’ve always wanted to make but for some reason, the grocery stores I visit never seem to have them. Imagine my delight this past weekend when browsing through the meat section, there they were. Deeply red short ribs, perfectly marbled with just the right amount of fat, and just waiting for me to take them home and do something delicious with them.
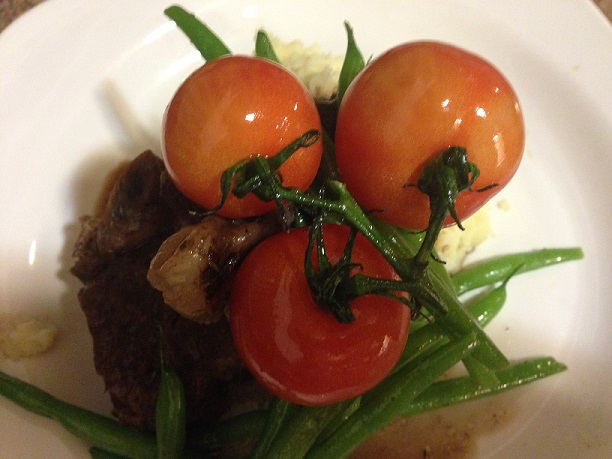
Wanting to make these absolutely perfect, I followed Chuck Hughes’ recipe – which, by the way, isn’t just a recipe for braised short ribs, but for an entire meal! I made it just the way he said (with the exception of putting garlic in the mashed seeing as how I forgot about mine in the oven and they burnt to a crisp,) and I also arranged it just the way he said. It was so fancy, in a house where fancy isn’t done all that often, that my husband even said we should have dressed up for dinner! I was tickled, and even more so when I tore into those ribs and they were falling apart tender, and such a good compliment to everything else on the plate.
Again, don’t worry about the cost of the meal. It’s not only worth it, but it’s also the price for the entire meal, and will feed at least six people.
Ingredients:
For the ribs: 3 large onions, roughly chopped 3 celery stalks, roughly chopped 4 large carrots, peeled and roughly chopped 3 beets, peeled and roughly chopped 3 heads of garlic, cut in half 2 sprigs fresh rosemary 2 sprigs fresh thyme 1 star anise 1 cinnamon stick 2 tablespoons canola oil 6 beef short ribs, with 2 to 3 ribs per piece 1 cup flour 2 bottles red wine (you can also substitute some or all of this with beef broth, the way I did) 2 tablespoons cocoa powder 1 cup brown sugar Handful of peppercorns Generous pinch of coarse salt Freshly ground black pepper
For the potatoes: 1 head garlic 1 tablespoon olive oil Several pinches of coarse salt Freshly ground black pepper 2 sprigs of rosemary 6 Yukon Gold potatoes, scrubbed but not peeled 1/3 cup butter 1 cup heavy cream
For the green beans: 1 pound green beans Water Salt 1 shallot, julienned 2 tablespoons butter
For the tomatoes: 1 package of cherry or cocktail tomatoes, still on the vine 1-2 cups olive oil 1/2 head garlic, sliced in half 2 springs fresh rosemary Salt
For the ribs:
1.) Preheat oven to 350 degrees Fahrenheit.
2.) Prepare all vegetables and place in a large bowl. Add herbs and spices, set aside.
3.) Cut ribs between the bones.
4.) Season ribs very well with coarse salt and dredge in flour until all sides are well coated.
5.) In a large Dutch oven, pour oil into pan and set over high heat. Sear all ribs on all sides until they are well browned all over (about 3 minutes per side.) Set aside.
6.) Turn heat down to medium-high and drop all vegetables into the same pan you browned the ribs in. Stir to pick up all the brown bits off the bottom, and cook until veggies are carmalized.
7.) Place meat back into pot and pour wine and/or beef broth over top. Make sure everything is covered. If not, fill with water until everything is.
8.) Sprinkle cocoa powder and brown sugar over top of the liquid and bring to a boil. Cover with lid or foil, and place in oven until meat is fork tender and falling apart (about 3 hours.)
9.) When ribs are finished, remove them from the oven, take them out of the pot, and place them on a platter, covered, to keep warm.
10.) Strain sauce into a different pan and boil rapidly until it’s reduced by half. When it’s reduced, add a bit of butter for sheen and flavour.
For the potatoes:
1.) Slice the top off a head of garlic, drizzle with olive oil, sprinkle with salt and pepper, and wrap in a foil packet. Roast for about one hour.
2.) Fill a large saucepan with water and add salt and potatoes.
3.) Bring to a boil, reduce heat and simmer, and simmer until they are fork-tender.
4.) Strain the potatoes and return potatoes to pot. Add butter and cream and mash well. Squeeze roasted cloves of garlic out of the paper skin and add to potatoes. Stir, and season with more salt and pepper if needed.
For the green beans:
1.) Clean the beans and blanch them in a pot of salted boiling water for about one minute.
2.) Drain and immerse in an ice bath to stop the cooking. Drain again.
3.) In a large skillet on medium-high heat, add butter and shallot; stir to soften. Add beans and then toss so that all beans are warmed through. Season with salt and pepper.
For the tomatoes:
1.) In a sauce pan, bring olive oil up to about 325 degrees Fahrenheit, just below the frying point. The oil just barely cover the potatoes.
2.) Season the oil with salt and pepper, and add the garlic to the oil.
3.) Carefully place the tomatoes into the oil poach until they swell slightly and nearly burst.
To assemble:
1.) Place a mound of mashed potatoes on the plate and flatten slightly.
2.) Place 2 or 3 short ribs on top.
4.) Place a small handful of green beans over beef, and top with tomatoes.
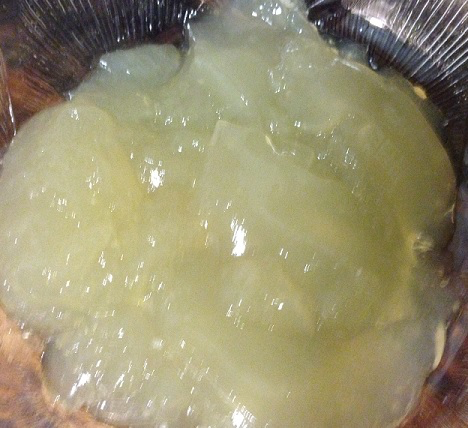
A weird thing happened to me after Christmas break this year. I had the honour of having most of my family over to my house on Christmas Day, and I cooked up a big gorgeous turkey for us to indulge in. Afterwards of course, I scooped up all the remaining bones, put them into a bag, and threw them into a freezer to be made into a wonderful soup once everything calmed down a bit. Well, make the stock I did. But something totally unexpected – and totally weird – happened when I put it in the fridge. It turned to jelly!! Not just the top layer (where fat usually sits and hardens,) but the entire thing! So naturally, I had to find out why this happened. And more importantly, was it still okay to eat?
It turns out that if your turkey stock turns into a jelly-like consistency after it’s been cooled in the fridge, you’ve made your stock perfectly. Apparently the bones have collagen inside of them, and when you simmer that collagen for a long time, it breaks down into gelatin. I’ve also read that this is the goal you’re trying to achieve with stock. Fortunately as I found out, once you bring that stock back up to temperature, the gelatin will melt and you’ll not only have a simmering potful of liquid stock – but it will be super rich and flavourful too. If you bring your stock up to a simmer and it’s still too tight for you, just dilute it with some water and it should become that rich flowing stock once again.
Now, I’ve made chicken stock about five thousand times, and this has never happened to me with chicken bones. Maybe because they’re smaller? I have no idea. But maybe it’s because I didn’t simmer it long enough for the collagen to turn into gelatin. I have also read that the more you reduce or simmer the stock, the more it will tighten up into gelatin.
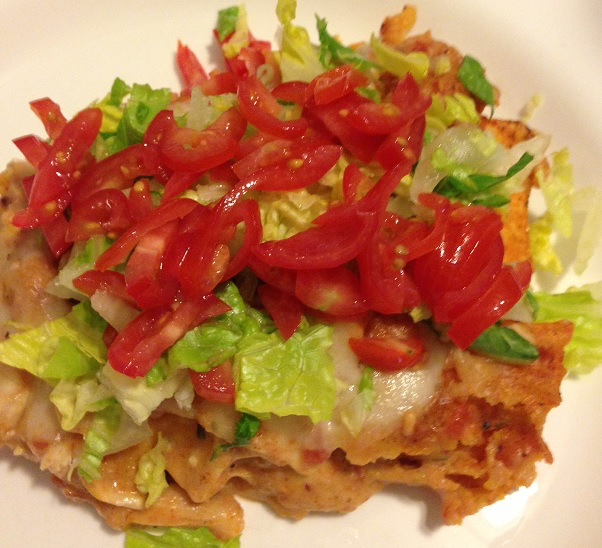
This casserole was sent my way via my mom, who finds some pretty fantastic stuff from around the Web. When I made it, my kids were instantly in love and have asked for it repeatedly since. If you feel strongly about not using canned soups or mixes in your home cooking, substitute the cream of chicken soup with a bechamel made with equal parts of chicken stock and milk. Also, keep in mind that this is not a recipe that freezes well. The chips turn to mush, and make the entire thing much less appealing. That just means that when you make this, you’ll have to eat all of it up that day. It’s pretty good, so that’s not hard to do.
Ingredients:
2 cups chicken, cooked and shredded (about 2 breasts) 2 cups Mexican or taco cheese, divided 1 can cream of chicken soup 1/2 cup milk 1/2 cup sour cream 1 can diced tomatoes 1/2 packet taco seasoning 1 large bag Doritos Shredded lettuce (optional) Diced tomatoes (optional)
Directions:
1.) Preheat oven to 350 degrees and grease a 2-quart casserole dish.
2.) In a large bowl mix together shredded chicken, 1 cup of the cheese, cream of chicken soup (or substitute), milk, sour cream, can of tomatoes, and taco seasoning. Mix well.
3.) Place a layer of Doritos chips along the bottom of the casserole dish. Top with a layer of the chicken mixture. Top with remaining cheese. If desired, and if you have any left, add a layer of Doritos chips on top.
4.) Cover with aluminum foil and bake in the preheated oven for 25-30 minutes until it’s hot and bubbling. Remove from the oven, top with shredded lettuce and tomatoes if you choose.
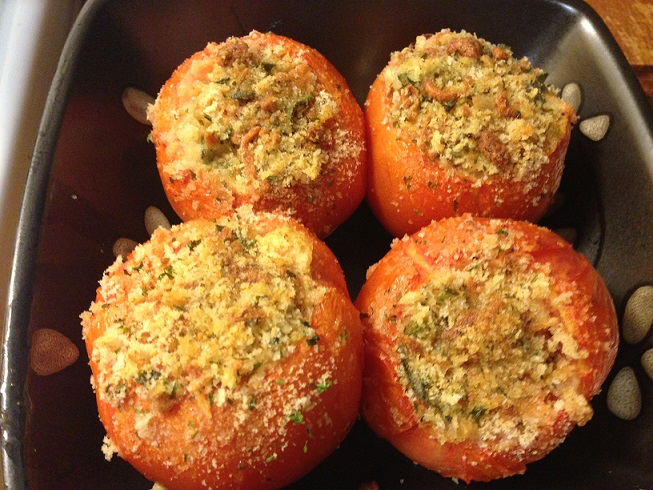
You can take just about any vegetable and stuff it with just about anything and I’ll love it. The same is true for these tomatoes (I know, I know, tomatoes are actually a fruit!) The things I stuffed these with are just the items I happened to have on hand, but you can use anything you want. Just remember that if you’re using meat, you should cook it before you stuff it into the tomatoes; and you should try to use bread crumbs on top as they add some texture and give them a nice golden brown colour on top.
Ingredients:
4 large field tomatoes 1 green pepper, chopped 1 red onion, diced 1 clove garlic, minced 1 cup chopped mushrooms 1/4 cup Parmesan cheese 1/4 cup bread crumbs 4 tablespoons olive oil, plus 2
Directions:
1.) Preheat the oven to 375 degrees. Using a paring knife, cut out the core and the middle of each tomato, leaving about an inch around the edges.
2.) In a medium-sized skillet, heat two tablespoons of olive oil over medium heat. Add chopped mushrooms and cook until mushrooms are brown and carmalized.
3.) In a large bowl mix together the green pepper, red onion, clove of garlic, and mushrooms. Mix so that all ingredients are thoroughly combined. Stuff this mixture evenly into the hollowed tomatoes.
4.) In a small bowl, mix together the Parmesan cheese and the bread crumbs. Top each tomato with this mixture.
5.) Place the tomatoes on a baking sheet or in a casserole dish and place them into the preheated oven. Bake for 25-30 minutes, until the tops are golden brown and the skins of the tomato are just starting to split. Remove from oven.