Originally published on March 22, 2012
Pergoies have a very special place in my heart. I mean, perogies that I have slaved over, folded each lovingly and individually, and cut out myself. These were the very, very first thing that I started cooking myself, when I decided I might get a little bit serious about cooking. I had made my mom’s chili and lasagna before; but this was the first one that I tracked down a recipe and started to make, painstakingly, all by myself. Let me tell you, perogies are not an easy one to start with, especially when you don’t have a pasta machine to roll out that paper-thin dough for you – something that I didn’t when I had just begun my perogie-making journey.
Now I do and let me tell you, it really does make a huge difference. I used to spend hours just rolling out dough alone, and it would still never be as thin as I wanted. With my handy-dandy machine though, it takes just a few minutes and I’m on to filling them up – one of the best and most fun parts about making perogies! The very best part of course is eating them though, and with a machine you get to do that so much faster!
I’ve always thought these perogies were terrific, but I’ve always also known that I’m biased about that because well, pergoies do have a very special place in my heart. But, my old friend who had a German grandmother who was famous for her perogies, once told me that mine were better than hers. And I’ve always sort of thought that said enough about them.
Ingredients:
1 recipe pasta dough
1 pound potatoes, peeled and diced
1 onion, finely diced
1 pound bacon, sliced
1 onion, halved and sliced
3 cups cheddar cheese, grated
Salt and pepper
3 tablespoons vegetable oil
3 tablespoons butter
4 tablespoons sour cream
Directions:
1.) In a very large pot of salted water, place diced potatoes and bring to a boil. Boil until the potatoes are fork-tender and then mash well.
2.) Add the finely diced onions and the cheddar cheese to the potatoes while they’re still hot, and stir to combine and melt cheese. Cool completely.
3.) While potatoes are cooling, roll out pasta dough as thinly as possible – about 1/8″ inch if rolling by hand, or the thinnest setting on a pasta machine. Once rolled, lay dough out on a lightly floured surface in a large sheet.
4.) Starting about 3″ up from the base of the dough, place small spoonfuls (about 2 teaspoons) of the potato mixture approximately 2″ apart on the pasta dough. Fold the base of the dough up and over all the small piles of potato mixture. Press the dough around each small pile of potato, trying to fold as close to the mixture as possible. Press to seal two sides of dough together, and then cut out pieces into individual perogies, in the traditional half-moon shape, if desired.
5.) Once perogies are made and cut, bring another large pot of salted water to a boil. Once at a rolling boil, drop the perogies into the water and boil for 1-2 minutes only. Remove perogies from water and transfer to a plate.
6.) In a large skillet, cook bacon bits over medium heat until brown and crispy. When finished cooking, drain on a plate lined with paper towel. Add sliced onions to the pan.
7.) Cook onions until they are soft and just beginning to brown. Add perogies, in batches and making sure not to overcrowd the pan. Cook for about 2-3 minutes per side, until brown and crispy and remove from pan.
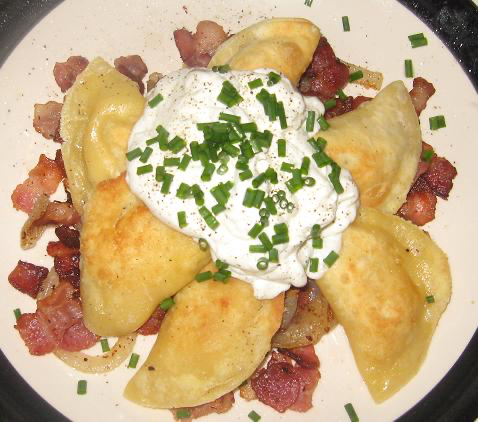
8.) Plate by placing perogies on a platter, covering with cooked sliced onions and bacon bits, and dolloping with sour cream, if desired.
9.) Serve and enjoy!