Originally published on May 14, 2017
Happy Mother’s Day to all the outstanding mothers out there working hard every single day for their families!
This recipe didn’t come from my mother, but rather her mother, my grandma! I grew up on this salad and while I’m sure it has some very official Estonian name, in my house we came to know it as simply Red Salad. And we ate it. A lot. We loved it so much and were always excited when the big bowl of Red Salad would make its way onto the table. My brother and I have had bona fide fights over who gets the last of the red salad. It’s that good, worth fighting over.
My version isn’t exactly my grandma’s version (and therefore, not as good). But it’s still pretty darned tasty. In place of the traditional pickled herring, I put in anchovy paste for that umami flavour, and I’m sure I mixed some other things up along the way, too. For instance, I don’t know if my grandma puts fresh dill in it. But I do know she puts it in a lot of other stuff and I happened to have some on hand, so in it went. It still ended up with that brilliant pink/red colour that will make a splash at any table, and it tasted awfully close to what my grandmother makes.
Ingredients:
- 1/2 pound beets, whole and unpeeled
- 1 pound Russet potatoes, whole and unpeeled
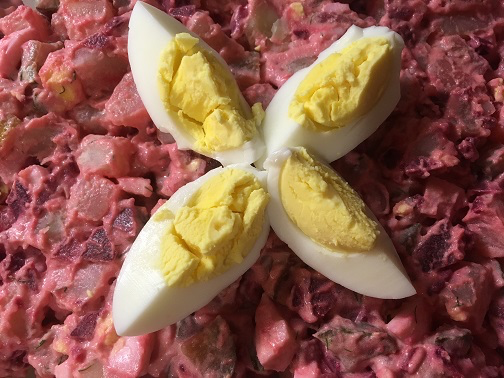
- 2 hard-boiled eggs, plus 1 or 2 for garnish
- 2 dill pickles, roughly chopped
- 1 cup mayonnaise (or more, depending on how dressed you like your salad)
- 1 tablespoon anchovy paste
- 1/2 teaspoon salt, plus more for boiling water
- 1 teaspoon sugar
- 2 tablespoons fresh dill, chopped
Directions:
1.) Place beets in a large pot with enough salted water to cover them completely, with at least an inch of water over top of them. Bring the water to a boil then lower to a simmer and boil just until the beets are fork-tender.
2.) Place potatoes in a separate large pot of salted water and again, add enough water to cover them with an extra inch of water. Boil until they too, are fork-tender.
3.) When potatoes and beets are both finished boiling, drain and when they are cool enough to handle, the skins should slip off easily. Both need to be chopped. The potatoes should be diced in about a medium dice, but the beets should be chopped a little more finely. Place both in a large bowl.
4.) Chop the eggs (to about the same size as the beets) and add them to the bowl, along with the dill pickles.
5.) In a small bowl, combine the mayonnaise, anchovy paste, salt, sugar and fresh dill. Stir well to incorporate all ingredients together. Pour over the bowl of potato mixture and stir to combine well.
6.) Quarter the remaining hard-boiled eggs and place on top of the salad as garnish.
7.) Serve and enjoy!