Kale Chips

Originally posted on March 14, 2017

I’ve made kale chips before and to be honest, I wasn’t too thrilled with them. I put them in the oven, toasted and salted them, and out came these little wisps that were no longer green. And they didn’t taste very good either.

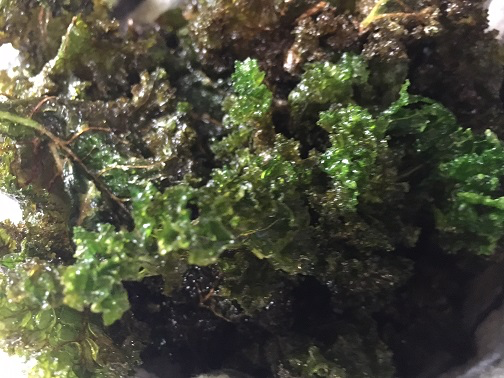
But, I come armed today with a new recipe for kale chips – the ultimate veggie chip that’s supposed to be both delicious and crazy good for you. I may have lowered the “crazy good for you factor” just a wee bit, when I decided to dunk them in oil this time, rather than dry them out in the oven. The difference is astounding. Now I know why people actually like and eat kale chips!

Ingredients:

  • 1 bunch of kale
  • Kosher salt
  • Canola or peanut oil, for frying

Directions:

1.) In a large heavy pot (or a deep fryer) heat 2 to 3 inches of oil to 350 degrees (you will need more if you’re using a deep fryer.)

2.) Thoroughly wash all the kale leaves and dry them very well. There’s already quite a bit of moisture in kale and if the leaves are not dry when they go into the hot oil, they can sputter and cause the oil to bubble over, which can be very dangerous. Dry your kale very well!

3.) Tear the leaves into bite-size pieces. Drop 5 to 7 pieces of kale in at a time. Let the kale fry for 30 – 60 seconds only and then remove with a spider or slotted spoon. Drain on paper towels and season generously with salt. Repeat with remaining leaves.

4.) Serve and enjoy!

Ree’s Sloppy Joes

Originally published on March 18, 2017

My past couple of recipes prove that you never stop learning in the kitchen. First there were the deep-fried kale chips that are a massive improvement on the old roasted ones I had on the site; and today it’s a new and improved Sloppy Joe recipe. Well, it’s new for our house anyway. Probably not for Ree Drummond, the Pioneer Woman, who’s probably been making them for years. Now I will too.

And, today is National Sloppy Joe day, so there’s no reason not to make them (and if you imbibed a bit too much for St. Patty’s Day yesterday, they’re super simple and the perfect greasy comfort food to settle a stomach!)

Ingredients:

  • 2 tablespoons butter
  • 2 1/2 pounds ground beef
  • 1 large onion, diced
  • 1 green pepper, diced
  • 1/2 carrot, shredded  
  • 5 cloves garlic, minced
  • 1 1/2 cup ketchup
  • 1 cup water
  • 2 tablespoons brown sugar
  • 2 teaspoons chili powder
  • 1 teaspoon dry mustard
  • 1/2 teaspoon red pepper flakes
  • Worcestershire sauce, to taste
  • 2 tablespoons tomato paste (optional)
  • Salt, to taste
  • Freshly ground black pepper, to taste

Directions:

1.) Add butter to a large skillet or dutch oven over medium-high heat. Add ground beef and cook until brown. Drain most of the fat and discard.

2.) Add onion, green pepper, and garlic. Cook for a few minutes, until the vegetables begin to soften.

3.) Add ketchup, brown sugar, chili pepper, dry mustard, and water. Stir to combine and simmer for 15 minutes, adding salt and pepper to taste. Add tomato paste, Worcestershire, and Tabasco, if using. Taste and adjust seasoning as needed.

4.) Pile sloppy joe mixture onto kaiser rolls, serve and enjoy!

Chicken and Potatoes One-Pot Dish

Originally published on March 24, 2017

The girls and I spent a little over a week with my family this past March Break and I did the cooking! Cooking at my childhood home is really no different than cooking at my current home – I still play around with different recipes and try new things. I knew this one-pot chicken and potatoes dish was going to be a hit around the table, full of Parmesan, garlic and a cream sauce that made us want to lick our plates (or maybe that was just me). I wish I was still there to partake of the leftovers!

Ingredients:

4 bone-in chicken breasts, cut into pieces if they’re very large
2 tablespoons butter
1 tablespoon olive oil
3 cups baby spinach, roughly chopped
1 pound potatoes, quartered
Salt, to taste
Freshly ground black pepper

For the sauce:

  • 1/4 cup butter
  • 4 cloves garlic, minced
  • 2 tablespoons all-purpose flour
  • 1 cup chicken broth
  • 1 tablespoon fresh thyme, chopped
  • 1 tablespoon fresh basil, chopped
  • 1/2 cup half and half
  • 1/2 cup freshly grated Parmesan cheese
  • Salt, to taste
  • Freshly ground black pepper, to taste

Directions:

1.) Preheat oven to 400 degrees and lightly oil a 9″ x 13″ casserole dish. Season chicken generously with salt and pepper.

2.) Melt 2 tablespoons of butter and 1 tablespoon of oil in a large skillet over medium-high heat. Add chicken, skin-side down, and sear until golden brown. Turn chicken and brown the other side for 2 – 3 minutes. Remove from pan and set aside.

3.) Place the spinach into the pan, stir to coat in the fat, and cook for just about 2 minutes, until the spinach is slightly wilted. Remove from pan, toss with the potatoes and set aside.

4.) To make the sauce, melt 1/4 cup of butter in the skillet over medium heat. Add the garlic and cook, stirring frequently, until fragrant, about 1 or 2 minutes. Whisk in flour until it’s fully incorporated into the fat and cook for 1 minute.

5.) Gradually whisk in chicken broth, fresh thyme and basil. Cook, whisking constantly, until fully incorporated, about 1-2 minutes. Remove from heat and stir in Parmesan and half and half. Season with salt and pepper to taste and stir until cheese and cream are fully incorporated.

6.) Place the potatoes and spinach in the bottom of the casserole dish and pour the garlic Parmesan over top. Place the chicken breasts over top of the potatoes.

7.) Place into the oven and cook for 40 – 45 minutes, until the chicken is cooked through and the potatoes are soft.

8.) Serve and enjoy!

Roasted Leg of Lamb with Mint Sauce

Originally posted on April 3, 2017

I love lamb. Like, I really love lamb. I try to buy it whenever I can when the husband isn’t here for dinner (he does not share my love of the lamb), but I always end up making it the same way. Lemon, garlic, rosemary – same way, every time. I’m just so scared of screwing it up! But this time, I wanted to do something a little different.

So I went with a leg instead of the lamb chops I usually go for; but I couldn’t bring myself to slather it in a curry rub or do something else that could possibly ruin the perfect piece of meat I’d just bought. I love it so much – what if I wrecked it? But, I still also really wanted to do something I hadn’t done before.

Then I thought, mint sauce. Why don’t I roast my leg of lamb with the same seasonings I usually do, but add a mint sauce that I already know goes so classically well with lamb? It was a good thought, but I can’t bring myself to add dollops of jelly to my dinner, either. So I grabbed a handful of mint, and turned it into a mint sauce reminiscent of chimichurri.

It gave me and the girls a different way to enjoy our lamb, it was one we all loved, and now I can say with confidence that mint really is a great accompaniment to lamb!

Ingredients:

  • 1 leg of lamb, between 4 and 5 pounds
  • 3 cloves garlic, minced
  • 3 tablespoons fresh rosemary, chopped
  • Zest of 1 lemon
  • 1 to 2 tablespoons olive oil
  • Salt, to taste
  • Freshly ground black pepper, to taste

For the mint sauce:

  • 1 bunch of fresh mint, finely chopped
  • 1 teaspoon sugar
  • 3 tablespoons white wine vinegar
  • Pinch of salt
  • Pinch of freshly ground black pepper

Directions:

1.) Preheat oven to 450 degrees Fahrenheit.

2.) Combine the garlic, rosemary, and lemon zest and rub all over the lamb. Drizzle generously with olive oil, transfer to a roasting rack and place in the hot oven.

3.) Roast the leg of lamb for 15 minutes then, without opening the oven door, turn the heat down to 350 degrees. Roast for another hour for medium to medium-rare, or another hour and 30 minutes for well done.

4.) Remove the lamb from the oven, tent with foil, and allow to rest for 10 – 15 minutes.

5.) While the lamb is resting, making the mint sauce by combining all of the ingredients and mixing very well.

6.) Carve the roast into slices and arrange on a platter. Drizzle the mint sauce over top.

7.) Serve and enjoy!

Chicken Quesadillas

Originally published on April 10, 2017

I love quesadillas. They’re quick, they’re easy, and they’re so tasty! Which is why when I made them for Girls’ Night a little while ago, I was appalled to find that I didn’t have one quesadilla recipe on the site. Not one! Well, that was something that had to be corrected right away, so I give you a great chicken quesadilla recipe!

I used to eat my quesadillas the way you’ll find them in most restaurants – tons of goodness stuffed inside, with salsa and sour cream on the side. Let me tell you, this is not the best way to do it. It wasn’t until I was working in a restaurant that I saw a better way. Instead of piling salsa into a little cup on the side, put it right into the quesadilla. You won’t have to dip it in, inevitably causing all the goodness inside to spill out, and I promise you, the tortilla will not get soggy.

Ingredients:

  • 1 tablespoon olive oil
  • 4 10-inch tortillas
  • 2 cups cooked chicken, shredded or cubed
  • 2 cups Cheddar cheese, shredded
  • 1 cup salsa
  • 1/4 cup fresh cilantro, chopped

Directions:

1.) Heat a cast iron skillet over medium heat. When hot, add olive oil and allow it to also heat.

2.) Place one tortilla inside the pan. On one side of the tortilla, sprinkle about 1/2 cup cooked chicken, 1/2 cup cheese, 1/4 cup of salsa, and 1 tablespoon of cilantro.

3.) Flip the empty half of the tortilla over the chicken mixture and allow to cook for about 3 minutes, until the bottom half is golden brown. Flip the quesadilla over and fry for another 3 minutes, until that side is also golden brown.

4.) Remove quesadilla from the pan and allow it to sit while you prepare the others. (This will not only help keep the heat inside, but will also prevent the cheese from spilling out while it’s lava hot.) Repeat entire process with the remaining quesadillas, even adding more oil to the pan if it runs dry.

5.) Once all the quesadillas have been cooked, slice them into wedges.

6.) Serve and enjoy!

Salty and Sweet Easter Treats

Originally published on April 16, 2017

For the past couple of years, I’ve made super simple, super easy Easter treats. I don’t know what it is – maybe because Easter falls on a Sunday and in this house ‘Sunday’ equals kinda lazy – but while I enjoy making treats just for the holiday, I don’t like knocking myself out making them. Maybe it’s just that I like the challenge of finding something that can be whipped up in just a couple of minutes. This year, I made the ultimate easy Easter snack.

It’s so easy in fact, that all you need is three ingredients and about 15 minutes of time. And if you’ve got some eager little hands hanging around wanting to help, they can even do it all on their own. The little hands at my house still aren’t totally comfortable around the stove just yet, so I did that part. But I promise you, the rest of these treats were made completely by a 9 and 11 year old. Now you can’t get any easier than that.

Ingredients:

(You’ll notice I haven’t given any amounts. You’ll need 1 each for every treat you make, but how many that is in total is completely up to you.)

Directions:

1.) Preheat oven to 200 degrees Fahrenheit and line a baking sheet (or two or three) with parchment paper.

2.) Lay the pretzels out on the baking sheet and place a Hershey hug in the centre of each.

3.) Place the pretzels in the oven for about 5 minutes, just until the chocolate has melted. If some of them still have their points after this time, don’t worry about it. They’re about to get squished down.

4.) Remove the pretzels from the oven and place a mini egg on top of each, pressing down on any of those points some of the chocolate may still have.

5.) Place in the fridge for about 10 minutes so the chocolate can set.

6.) Serve and enjoy!

Grilled Pimento Cheese Sandwiches

Originally published on April 30, 2017

The month of April really came in like a lamb and went out like a lion at our house. It began with a wonderful family vacation to Quebec City, and ended with me in bed pneumonia-ridden and suffering from several antibiotic side effects. That sickness almost made me miss Grilled Cheese Month altogether, but here we are. It’s the last day of the month, I’m healthy, and I have a delicious grilled cheese sandwich recipe that I made pre-sickness and have just been waiting to share with you.

The cheese in this sandwich isn’t your typical cheese. It’s pimento cheese, which I believe you can get in handy little jars if you live in one of the Southern states, but I’ve never seen it on my grocery store shelves. The good news is, it’s super easy to make.

If you’re going to pile it into grilled cheese sandwiches like I did after whipping it together, do yourself a favour and leave it to just about 1/4 cup. I used about twice as much and ended up with a sandwich that, while delicious, could’t be picked up and eaten but needed a knife and fork. Not terrible, but definitely not something you can eat on the go either. However you choose to eat it, this is one sandwich that’s sure to have you looking differently at grilled cheese.

Ingredients:

  • 1/2 cup pimentos, roughly chopped
  • 2 cups sharp Cheddar cheese, grated
  • 1/2 cup mayonnaise
  • Pinch of salt
  • Pinch of black pepper
  • 8 slices white bread
  • 1/2 cup butter, room temperature

Directions:

1.) Place the pimentos, Cheddar cheese, mayonnaise, salt and pepper in a large bowl. Mix to combine well.

2.) Heat a pan over medium heat. Butter one slice of bread an place it butter-side down in the preheated pan. Spoon on 1/4 cup of the pimento cheese and spread it across the bread. Butter another piece of bread and place it, butter-side up, on the pimento cheese.

3.) Fry the sandwich on one side for 3 – 4 minutes, until it’s golden brown on that side. Flip and fry for another 3 – 4 minutes, until that side is also golden brown and the cheese inside is melted. Repeat with remaining pieces of bread, making 4 grilled cheese sandwiches in total.

4.) As sandwiches are finished, remove from pan and place on a cutting board or other work surface. Allow to rest for just a minute or so before cutting in half.

5.) Serve and enjoy!

Proper Beer-Battered Fish

Originally published on May 3, 2017

So, before making this recipe, it had been nearly 10 years since I made fish and chips at home. That’s right. 10 years. Why? Because the last time I made it, it turned out to be a big bland awful mess. The beer batter stuck to the fryer basket, fell off when I tried to take the fish out, and just didn’t end up tasting like anything at all. I vowed to just leave it to the professionals in restaurants and chip trucks.

But, then I went back to working in a restaurant and learned how to make proper beer batter. I made it repeatedly, I used it to fry fish repeatedly, and it never ever stuck to the fryer basket. It wasn’t bland. In fact, it might be the best fish and chips I’ve ever had. So, summoning up all the courage I had, this past Good Friday I decided to give it a go and try to make fish and chips at home once again.

As you can see from the picture, the only place the batter stuck was onto the fish, and we all sat down to a beautiful fish and chips dinner to kick off Easter weekend.

Ingredients:

  • 2 cups all-purpose flour, plus 1 cup
  • 1 tablespoon baking powder
  • 1 teaspoon salt
  • 1 bottle dark beer (I used Guinness)
  • Juice of 1 lemon
  • 4 haddock fillets
  • Vegetable oil, for frying

Directions:

1.) Place 1 cup of flour on a plate and set aside. Fill a Dutch oven or other heavy pot halfway with vegetable oil. Turn heat to medium-high and let it preheat to about 350 degrees Fahrenheit while preparing beer batter.

2.) In a large bowl combine 2 cups of all-purpose flour, baking powder and salt. Add the beer and lemon juice and whisk to incorporate all ingredients.

3.) When ready to start frying, place haddock fillets, one by one, into the plate of flour. Turn to ensure that the entire piece of fish is coated. Shake off excess flour and dip the fish into the beer batter. Remove from the batter and allow excess to drip off.

4.) Slowly place the fish into the hot oil, moving the end piece in the oil a bit as you do. This will prevent it from falling to the bottom of the pot and sticking. Fry for 2 minutes on one side then flip and fry for another 1 – 2 minutes, just until the fish is entirely cooked through. Drain excess oil by laying the fillet on paper towels. Repeat with remaining haddock fillets.

5.) Garnish with lemon slices and tartar sauce.

6.) Serve and enjoy!

Tequila Sunrise

Originally published on May 5, 2017

It’s Cinco de Mayo! Every year I get excited about this holiday and use it as an excuse to partake of all kinds of Mexican food and drink. Little bit of trivia for you, while Mexicans docelebrate the day, they don’t actually call it Cinco de Mayo – that’s something reserved for the rest of North America. Instead, they celebrate The Day of the Battle of Puebla or rather, the day that the Mexican Army rose up over the French soldiers that were occupying their land and won that very significant battle. So that’s the history behind it, now on to the celebration!

Anyone that follows my blog knows that margaritas hold a very special place in this house. I make them often and if Brent and I are out celebrating something special, we usually order one (or two, or three.) This year though, I wanted to do something different. I mean, there has to be another drink that highlights tequila but doesn’t require a bunch of ice to be crushed beforehand.

Just as I thought, there is. And it’s one of the prettiest drinks I’ve ever made.

Ingredients:

  • 3 ounces (6 parts) orange juice
  • 1 1/2 ounces (3 parts) tequila
  • 1/2 ounce (1 part) grenadine

Directions:

1.) Place orange juice and tequila in a cocktail shake and give it a good shake. Pour over ice into a tall glass.

2.) Add the grenadine to the glass. Do not stir. It will sink to the bottom and give the illusion of that sunrise for which the cocktail got its name.

3.) Serve and enjoy!

Rigatoni in a Vodka Sauce

Originally published on May 8, 2017

There’s not a lot that can compete with my love of pasta. I love it in all shapes and forms, and I love trying out new sauces to go with them. The one I tried most recently was pasta in a vodka sauce and OMG, guys. It’s incredible. It only takes a few minutes to whip up (I did it during intermission while the playoffs were on) and it brings in all these new flavours that you may or may not have tried in pasta sauce before.

Of course, it all starts with tomatoes. I chose crushed because I wanted it to be saucy and not just tomato-y, but there are lots of recipes out there that call for whole tomatoes to be crushed slightly with your hands. So you can definitely take it that way if you’d like. Then, in addition with the vodka (that’s not too much,) a bit of cream also goes in to share the spotlight and take a bit of that acid away from the tomatoes.

It’s delightful and just like when you cook with wine, it’s perfectly suitable for kids. The alcohol in the vodka boils off so there’s no need to worry, even if Brent couldn’t help but call it the “get your kids to sleep hack.”

Ingredients:

  • 1 pound rigatoni pasta
  • 1 28-ounce can crushed tomatoes
  • 1 tablespoon butter
  • 1 small onion, minced
  • 1 clove garlic, minced
  • 1/4 teaspoon red chili flakes
  • 1/2 cup vodka
  • 2/3 cup heavy cream
  • 1/2 cup freshly grated Parmesan cheese
  • 3 tablespoons fresh basil, roughly chopped

Directions:

1.) Bring a large pot of salted water to a rolling boil. When boiling, add the rigatoni and cook until just before the pasta reaches the al dente stage. I used durum semolina pasta, which takes a bit longer to cook, about 10 minutes. When done cooking, reserve 1 cup of the pasta cooking water and then drain.

2.) While pasta is cooking, melt butter in a heavy-bottomed saucepan. Add the onion and cook for about 3 minutes, just until the onion is translucent. Add the garlic and red pepper flakes and cook for another 30 seconds.

3.) Remove the pan from the heat and add the vodka, tomatoes, and salt to taste. Return the pan to the heat and cook for another 7 minutes to boil the alcohol off. Stir in the heavy cream and cook for another 3 minutes, until the sauce thickens. Stir in the Parmesan and basil.

4.) Add the cooked pasta to the pan, along with the reserved cooking water. Toss and taste, adding more salt if necessary. Garnish with more Parmesan and basil, if desired.

5.) Serve and enjoy!