Originally published on January 17, 2014
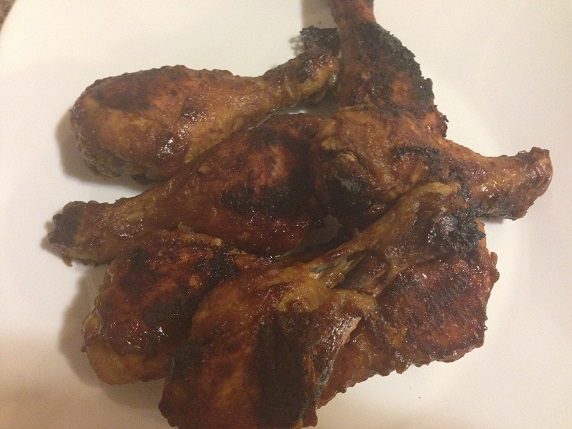
I had taken some chicken drumsticks out of the freezer one day, not knowing for most of the day what I had planned to do with them. I did a quick search when I just couldn’t go on being indecisive any longer, and had to get dinner onto the table. The A Spicy Perspective blog had this fantastic recipe and not only did I make that night, our daughter, Maddie, asks me to make it all the time. It’s something that’s super delicious, and cooks up in almost no time.
I’ve always kept all the measurements the same, but used only about 10 drumsticks at a time. Even as much as we love this one, 20′s still a lot for us to eat! The original recipe also calls for pineapple juice, something I just don’t usually have on hand. I always substitute it with orange juice, and it’s really good!
Ingredients:
10 chicken drumsticks
1/3 cup flour
3 tablespoons corn starch
1 tablespoon salt
3 1/2 cups orange juice
1 cup brown sugar
1/4 cup soy sauce
2 tablespoons fresh ginger, grated
3 large cloves garlic, minced
1/4 cup – 1/2 cup sriracha chili sauce (depending on how hot you like it)
Directions:
1.) Preheat the oven to 450 degrees Fahrenheit. Line a rimmed baking sheet with aluminum foil, spray with non-stick cooking spray and set aside.
2.) Mix the flour, corn starch and salt together in a bowl. Rinse the drumsticks and pat dry with paper towels. One by one, roll the drumsticks in the flour and corn starch mixture and place on baking sheet in individual rows.
3.) Place in the oven and bake drumsticks for 15 minutes, then flip and bake for 15 minutes more.
4.) Meanwhile, pour the orange juice and all remaining ingredients in a sauce pot. Bring the sauce to a boil, reduce heat, and simmer for 30 minutes, stirring occasionally.
5.) After drumsticks have been baking for 30 minutes and sauce is cooked, remove chicken from oven and pour sauce entirely over each drumstick.
6.) Place chicken back in the oven and bake for another 20 minutes until the sauce has thickened and chicken is nice and sticky.
7.) Serve and enjoy!