Originally published on June 4, 2015
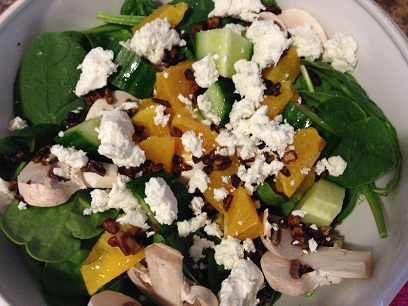
This salad sort of comes from my work. While we serve a salad that’s very, very similar to this (and we do call it Harvest Salad), I did have to make several substitutions due to what I had in my fridge. It’s so good, I often say I’m pretty sure this
This salad sort of comes from my work. While we serve a salad that’s very, very similar to this (and we do call it Harvest Salad), I did have to make several substitutions due to what I had in my fridge. It’s so good, I often say I’m pretty sure this salad isn’t even good for you. It tastes like candy!!
Ingredients:
For the salad:
- 2 cups, firmly packed, fresh spinach $1.49
- 1 orange (I cut my wedges in half but you can leave them whole if you’d like)
- 1/4 cup sliced fresh mushrooms
- 1/4 cup cucumber, cut in a large dice
- 1/4 cup candied pecans
- 2 tablespoons goat cheese, crumbled
For the salad dressing:
- 1/4 cup canola oil
- 1/4 cup fresh raspberries (can use frozen, just thaw them first)
- 2 tablespoons white wine vinegar
- 1 tablespoon seedless raspberry jelly
- 1 tablespoon sugar
- 1 teaspoon Dijon mustard
- 1 teaspoon poppy seeds
- 1/4 teaspoon onion powder
Directions:
1.) Place spinach in a large bowl and place all other salad ingredients on top.
2.) One by one, measure out and place all dressing ingredients in a large measuring cup. Process with an immersion blender to fully combine and emulsify the salad dressing. Pour as much as you’d like over the salad and save the rest in an airtight container in the fridge.
3.) Serve and enjoy!