Originally published on January 27, 2015
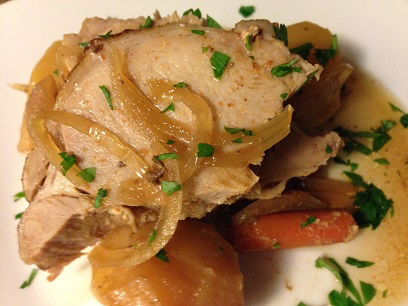
I love recipes that you can make in the slow cooker. Not only are they super easy, but for working parents such as myself, it’s reassuring to know that the family is still eating a nutritious meal even while you’re at work. This recipe gives you an entire meal – including protein, starch, and vegetable – and it’s super tasty, too. I used a bone-in roast, which gave us some gorgeous pork chops once the roast was cut; and because of all the onions in there the sauce that you spoon over top of the lot once it’s done is reminiscent of French Onion soup. Have you ever had French Onion soup poured over pork? It’s pretty darn good.
Ingredients:
2 small onions, thinly sliced
3 1/2 pounds bone-in pork loin roast
2 tablespoons olive oil
1 cup hot water
1/4 cup sugar
3 tablespoons vinegar (any kind you like)
2 tablespoons soy sauce
1 tablespoon ketchup
1 tablespoon garlic powder
1/2 teaspoon hot sauce
5 potatoes, peeled and quartered
1 – 2 cups baby carrots (depending on how much you need or want)
Fresh parsley, chopped, for garnish
Salt
Pepper
Directions:
1.) Season the pork roast generously with salt and pepper. Heat 2 tablespoons of olive oil over medium-high heat in a skillet. When hot, add the pork roast and sear on all sides for 3 – 5 minutes, until it’s browned on all sides. Turn off heat and transfer to a plate.
2.) Lay half of the onion slices evenly on the bottom of the slow cooker. Evenly spread the potato quarters over top of the onion slices and spread the remaining onion slices over top of the potatoes. Place the pork roast on top of the potatoes and fill in the sides with baby carrots.
3.) In a bowl combine the hot water, sugar, vinegar, soy sauce, ketchup, garlic powder, hot sauce, and a pinch each of salt and pepper. Whisk to thoroughly mix all ingredients together, and then pour over the pork roast and other ingredients in the slow cooker. Cover the slow cooker with a lid and set on low for 6 – 8 hours, or high for 4 – 5 hours.
4.) Serve and enjoy!