Originally published on September 26, 2014
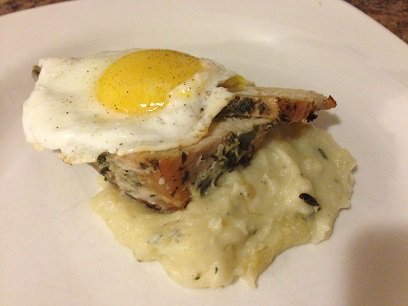
The fried egg craze that has had us throwing them onto burgers and sandwiches has been around for awhile and it doesn’t look like it’s going anywhere anytime soon. But in France they’ve been doing this even longer than we have, and leave it to the French to call it something very fancy-sounding and make it even simpler. In this dish, Oeufs en Reste, all that’s needed is some leftovers you’re looking to spiff up and as many fried eggs as you can handle. Traditionally the leftovers used come from a roast, but I think you can use just about anything you think would work with a fried egg. I used a pork roast and mashed potatoes I had in the fridge. And I have to say, they were some of the best leftovers I’ve ever had.
Ingredients:
6 – 8 slices of leftover pork roast (or other leftover protein)
3 cups leftover mashed potatoes (or other side)
3 – 4 eggs (depending on how many you’re serving or would like)
1 tablespoon olive oil
Salt
Pepper
Directions:
1.) Preheat the oven to 400 degrees Fahrenheit. When hot, place roast and mashed potatoes in separate oven-proof dishes and cover. Place in the oven and heat them until they are completely warmed through.
2.) While leftovers are warming, heat the olive oil in a skillet set over medium heat. When hot, gently crack the eggs into the pan and cook until white has completely set both underneath and on top, around the yolk. You can flip them if you prefer your eggs over-easy, but I think the presentation is nicer when they’re left sunny-side-up. Just be sure that the whites have completely set – no one wants to eat raw egg. When eggs are finished cooking, season them with salt and pepper and remove the entire pan from the heat.
3.) Plate the mashed potatoes so they are in the centre of the plate and then lay a couple of slices over top of them. Do the same with the other plates that will be served. When the leftovers are plated, gently lay the eggs over top of the meat.
4.) Serve and enjoy!