Originally published on September 12, 2014
Here’s a fun story about chicken wings that shows how they went from kitchen scraps to one of the most expensive parts of the bird.
Before 1964, chicken wings were in fact considered to be one of the “garbage parts” of a whole chicken. They were often thrown out or thrown into a stock pot to be used as more of a flavouring than anything else. But it was at this time when proprietor of the Anchor Bar, Frank Bellissimo, mistakenly received a shipment of wings instead of chicken necks to make his famous stock, he didn’t want them to go to waste (and apparently, had no faith that they would make just as good a chicken stock as anything else.) So instead, he handed off the shipment to his wife, Teressa Bellissimo, and asked her to make an appetizer out of them that they could serve in the bar. She fried them up, doused them in hot sauce and, because the bar was in Buffalo, New York, called them “Buffalo wings.” Today, you can still visit the Anchor Bar in Buffalo, and see their banner sign out front that marks them as the “Home of the Original.”
Today’s chicken wing recipe doesn’t include a sauce of any kind (and that’s probably why my mom, who emailed me the link from Pillsbury, likes them so much,) but they are still full of flavour – and to boot, they’re super easy and quick to make!
Ingredients:
2 pounds chicken wings
2 tablespoons chili powder
1 1/2 teaspoons dried oregano
1 1/4 teaspoons cayenne pepper
1 teaspoon garlic salt
1 teaspoon ground cumin
1 teaspoon pepper
Directions:
1.) Place chili powder, oregano, cayenne pepper, garlic salt, cumin, and pepper into a large resealable bag. Shake well to thoroughly mix all spices and then add the chicken. Shake again to thoroughly coat the chicken in the spices and then place in the fridge for at least one hour to marinate. You can leave the chicken in longer than that, but don’t leave them any longer than 24 hours.
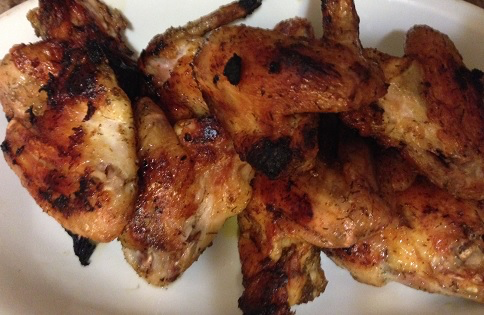
2.) Heat an indoor or outdoor grill to medium heat. When hot, add the chicken directly onto the grill, or place them in a grill basket to cook. Close the lid of the grill or tent an indoor grill with aluminum foil to cover. Cook for 20 to 25 minutes, turning chicken after 10 minutes. When done, juices of the chicken should run clear and the inside should reach a temperature of 180 degrees Fahrenheit.
3.) Serve and enjoy!