Chocolate Fudge Pudding

Originally published on April 19, 2014

When I was given a recipe for Chocolate Fudge Pudding by the same person who gave me the recipe for The Greatest Chocolate Cake I’ve Ever Made, I was excited. I mean, that chocolate cake was so good, and now there were expectations to be met. Thankfully, this chocolate pudding surpassed even those.

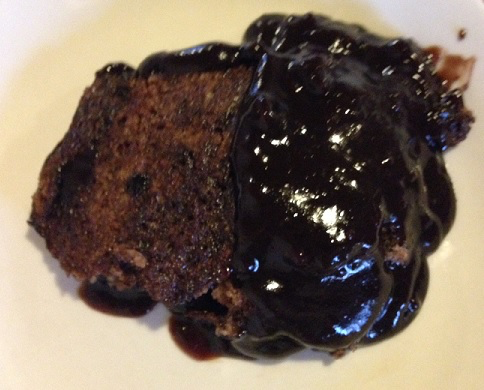
This pudding reminded me of childhood. Remember when your mom used to make you chocolate pudding? It didn’t come out of a fridge, and you didn’t have to peel back any plastic tops before you could dive in. No, it came to the table piping hot, fresh out of the oven, and it was always a mixture between cake and pudding – so you really got the best of both worlds. That is what this pudding is like. Enjoy, and then enjoy again. Because you will be back for more.

Ingredients:

1/4 cup butter 
2/3 cup sugar 
3/4 cup flour 
1/2 teaspoon salt 
1/2 cup milk 
1 1/2 teaspoons baking powder 
1 teaspoon vanilla extract
1 square unsweetened chocolate, melted (you can also substitute 1 tablespoon butter with 3 tablespoons of cocoa, melted together) 
1 1/2 cups boiling water 

For the topping:
1/2 cup white sugar 
1/2 cup brown sugar 
1/4 teaspoon salt 
3 tablespoons cocoa 

Directions:

1.) Preheat oven to 350 degrees and grease and flour an 8″ x 8″ cake pan.

2.) Cream the 2/3 cup sugar and the butter together in a large bowl. Add the flour, salt, milk, baking powder, vanilla extract, and melted unsweetened chocolate (or butter/cocoa substitute.) Beat with a wooden spoon for two to three minutes, until the mixture takes on a slightly curdled appearance (don’t worry, it’ll get there!)

3.) In a separate bowl, combine all the ingredients for the topping.

4.) Pour cake mixture into the floured cake pan and sprinkle topping generously over top. Place cake pan on a baking sheet (in case it bubbles over,) and then carefully pour the boiling water over the entire top.

5.) Place in the oven and bake for one hour. After removing it from the oven, allow the pudding to rest for just a few minutes before serving.

6.) Serve and enjoy!

Bunny Cupcakes

Originally published on April 20, 2014

These cupcakes will work with pretty much any cupcake and frosting recipe you choose, and the assembly comes together quicker than you’d think. They’ll also make your day just that much tastier as  you nibble away on them. Happy Easter, everyone!

Ingredients:

For the cupcakes:

1 3/4 cups all-purpose flour 
1 1/2 teaspoons baking powder 
1/4 teaspoon salt 
3/4 cup unsalted butter, room temperature
1 cup sugar
1 1/2 teaspoons vanilla extract
3 eggs, room temperature 
1/2 cup milk 

For the frosting:

1/2 cup butter, room temperature 
1 package Philly cream cheese, room temperature
2 – 3 cups powdered sugar
1 teaspoon vanilla extract 

For the assembly:

2 cups sweetened coconut 
12 large marshmallows
1/2 cup yellow sugar 
1/2 cup pink sugar 
1/2 cup purple sugar 
6 stick pretzels, snapped in half 
24 chocolate chips 
12 jelly beans 

Directions:

To make the cupcakes:

1.) Preheat the oven to 350 degrees and line a 12-tin muffin tray with paper liners.

2.) In a medium-sized bowl, combine the flour, baking powder, and salt and whisk. Set aside.

3.) In a separate bowl, cream together the butter, sugar, and vanilla extract with an electric mixer. Add the eggs, one at a time, beating after each addition until it’s fully incorporated. Slowly add the dry ingredients with the mixer on low, alternatively adding the milk and ending with the flour. Spoon the batter into the lined tins.

4.) Bake for about 25 minutes, until a toothpick inserted into the centre comes out clean. Set aside and allow them to completely cool before frosting.

To make the frosting:

5.) In a large bowl, mix the butter and the cream cheese together until smooth, about three minutes. Scrape down the sides occasionally to ensure even mixing.

6.) Add the vanilla extract and mix. Slowly add the powdered sugar until frosting reaches your desired thickness and sweetness.

For the assembly:

7.) Use an offset spatula or piping bag to frost the top of each cupcake entirely with frosting.

8.) Place coconut in a bowl. Holding one frosted cupcake upside down, lightly turn frosting in the coconut, coating the top of the cupcake as you do. When the top of one cupcake is completely covered in coconut, set aside and move on to another cupcake. Repeat until all cupcakes have been covered in coconut.

9.) Place each colour of sugar on its own shallow plate. Using sharp kitchen shears, cut each large marshmallow in half diagonally. Dip the cut side of each marshmallow into one colour of sugar, ensuring that you keep the marshmallow with its pair, and that each side is dipped into the same colour (so that you don’t end up with a bunny with one pink ear and one purple.)

10.) After marshmallow has been dipped in sugar, insert one end of a pretzel into the flat bottom side of it, making sure there’s a small piece of pretzel sticking out of the marshmallow. This is going to be the support for the marshmallow as it sits on the cupcake, so there needs to be enough. Place the portion of the pretzel that’s sticking out of the marshmallow into the side of the top of the cupcake. Do the same with the marshmallow half of the same coloured sugar, and then place on the other side so that they look like bunny ears.

11.) Use a piping bag or dip the pointed end of a chocolate chip into frosting to ensure that it’s entirely coated. Place this underneath one of the ears, pointed side down, to look like an eye. Do the same thing with another chocolate chip on the other side.

12.) Use a piping bag or dip one side of a jelly bean into frosting to ensure that one side is entirely covered. Then, below and in between the bunny’s eyes, place the jelly bean so that it looks like a nose.

13.) Repeat with remaining cupcakes.

14.) Serve and enjoy!

Martin’s Zucchini and Mushrooms

Originally published on April 21, 2014

You can name just about any main dish and the chances are good that I’ll be even more interested in the sides that come with it. That includes steak, and even pasta. There’s just something about side dishes that’s so good! So when my brother came up with one that includes two of my favourite vegetables – zucchini and mushrooms – I knew I was all in. The first time I had this was when Martin made it for me but I’ve made it since (plenty of times) and it’s really simple. Because it’s cooked in a skillet or pan, you don’t need to do it on the grill, but I do find that it adds more flavour if you do. (And that is Martin’s official way of preparing it.)

Ingredients:

1 zucchini 
1/2 pound (about 2 cups) of mushrooms, sliced
2 tablespoons olive oil
Salt 
Pepper 

Directions:

1.) Preheat grill to medium heat. Cut zucchini in half and, using a spoon, scoop seeds out of the middle.

2.) Place olive oil in a grill pan or pan set directly over the flame of the grill and allow it to heat through. When it has, add the zucchini and the mushrooms at the same time. Toss to coat everything in the olive oil and then cook, stirring occasionally, for about ten to fifteen minutes, until the mushrooms are carmalized and the zucchini is just beginning to brown. Season with salt and pepper to taste.

3.) Serve and enjoy!

Creamed Spinach

Originally published on April 22, 2014

If you’re like me, there’s a very good chance that you’ve been making creamed spinach all wrong. Have you been putting all your spinach into one big pot, letting it wilt, and then just adding a splash of cream at the very end? Have you stirred frantically so that all that yummy cream doesn’t disappear before you can get it to the table? Yep, that’s what I was afraid of. That is in fact, one way to make creamed spinach. But if you want a dish that will truly satisfy, that will actually warm you from the inside out, and that you will dream about, there is only one way to make creamed spinach. It’s this way, the right way.

Ingredients:

2 bunches of spinach (you should have about 8 cups of fresh spinach leaves)
2 shallots, diced 
2 garlic cloves, minced 
1 1/2 cups milk
2 tablespoons butter 
2 tablespoons flour 
Salt 
Pepper 
1/2 teaspoon nutmeg

Directions:

1.) In a very large pot, wilt spinach, in batches if necessary. Be sure to wilt the spinach just until it is wilted, and not so much that it’s over-cooked and mushy. You don’t need oil or anything else in the pot, just place a batch in, let it wilt some, stir some more in, and continue until all spinach has just wilted. Then, turn heat off, set aside, and make the bechamel.

2.) In a separate pot, melt butter over medium heat. Add shallots and garlic and cook for about one minute, just until the shallots turn translucent. Then add the flour and whisk until flour is fully incorporated. Cook for about two minutes.

3.) Very slowly add milk, whisking as you do to avoid clumps. Once all milk has been added, season with salt, pepper, and nutmeg, and let the mixture cook for a few minutes until it begins to thicken. Be sure to continue whisking as it cooks so the milk does not burn to the bottom.

4.) Once milk has thickened, add the spinach, stir and taste for seasoning and adjust if necessary.

5.) Serve and enjoy!

Rachel’s Deviled Parmesan Chicken

Originally published on April 23, 2014

Over Easter weekend, I was at my sister-in-law’s, and my mother-in-law (and fellow foodie) told me about a delicious chicken dish she had made (and that I hope to be making soon,) in which she slathered Greek yogurt all over the bird before breading it and throwing it in the oven. When the very next day I saw Rachel Ray doing pretty much exactly the same thing, I knew. The universe was telling me to make the chicken. I did, and I was very happy about it.

Ingredients:

4 boneless, skinless chicken breasts 
1 cup Dijon mustard
1/2 cup fresh rosemary, finely chopped
1/2 cup fresh parsley, finely chopped
2 cloves garlic, finely minced 
Juice of half a lemon 
4 tablespoons olive oil, divided
Salt 
Pepper 
1 1/2 cups fine breadcrumbs
2 slices white bread 
1 cup Parmesan cheese, freshly grated
2 tablespoons paprika 
1 teaspoon cayenne pepper 
Salt 

Directions:

1.) Preheat the oven to 400 degrees Fahrenheit and line two baking sheets with parchment paper.

2.) One by one place each chicken breast in a large resealable freezer bag. With a mallet or rolling pin, gently pound chicken breast to an even thickness. Set aside and repeat with remaining chicken breasts.

3.) Place two slices of white bread in a food processor and pulse until the bread is entirely torn apart and is in small pieces. Basically you want them to be coarse, moist breadcrumbs. These will add great texture to the chicken.

4.) Place Dijon in a medium-sized bowl and add the chopped rosemary, parsley, minced garlic, lemon juice, 2 tablespoons of olive oil, salt, and pepper. Mix thoroughly and set aside.

5.) In a separate bowl, mix together both the fine and fresh breadcrumbs, the Parmesan cheese, paprika, cayenne pepper, and salt.

6.) Brush Dijon mixture liberally over each piece of chicken, on all sides. Then place in bowl with the breadcrumbs and press breadcrumb mixture over entire piece of chicken before placing on a baking sheet. Repeat with remaining pieces of chicken, placing two pieces of chicken on each baking sheet. When each piece of chicken is breaded, drizzle all four with remaining two tablespoons of olive oil.

7.) Place both baking sheets in the oven and bake for 45 – 60 minutes, depending on how large the pieces of chicken are, until they are crispy and golden brown.

8.) Remove from oven and allow chicken to rest for just a minute or two before serving.

9.) Serve and enjoy!

BLT Salad

Originally published on April 24, 2014

I’ve said before that I can become somewhat irritated by salad that has lettuce in it. But when the lettuce is the main component and when it helps with the simplicity of the dish, it is no longer boring and can even be something I really love. I made this salad for dinner one night and while I would have preferred to make it with a dressing much more like Caesar salad dressing, which is mayonnaise-based (because that’s what you’d eat on a BLT sandwich,) I was limited when making it for my oil/vinegar-based-loving family. I have to say, I think the simple salad dressing worked even better than anything creamy would have.

Ingredients:

1 head Romaine lettuce, washed, dried, and chopped 
1 large tomato, diced 
4 slices bacon 
1/2 cup Parmesan cheese
1/2 cup olive oil
3 tablespoons rice vinegar 
1 teaspoon sugar 
Salt 
Pepper 

Directions:

1.) Place bacon in a skillet over medium heat. Cook, turning occasionally, for about 10 minutes, until bacon is very crisp. Drain on paper towels before crumbling or cutting into bite-size pieces.

2.) Meanwhile, combine the olive oil, rice vinegar, sugar, salt and pepper in a small bowl and whisk vigorously to combine. Set aside.

3.) Place lettuce and tomato in a large bowl. Drizzle the salad dressing over top and mix thoroughly to combine. Top with bacon pieces and sprinkle Parmesan cheese over top.

4.) Serve and enjoy!

Apr

Roasted Chickpeas

Originally published on April 25, 2014

Anyone who knows me well knows that I love to snack. So much so in fact, that I do it often and so I better make sure that my snacks are healthy ones. Radish chips are one of my favourite go-tos, as are Tuna Boats. Ever since my mom sent me this recipe for Roasted Chickpeas, this one tops the list, too. The recipe she sent said the chick peas should only be in the oven for about 40 minutes, but mine were in there for over an hour before they were a texture that I liked. That ended up being something very similar to Corn Nuts (who doesn’t love Corn Nuts?) They’re very crispy, very crunchy, and super healthy for you. That means you can eat as many as you’d like!

Ingredients:

1 can chickpeas, rinsed and patted dry
3 tablespoons olive oil
2 tablespoons garlic powder 
1 tablespoon cumin 
1 teaspoon cayenne pepper 
A generous amount of salt 

Directions:

1.) Preheat the oven to 400 degrees Fahrenheit and line a baking sheet with parchment paper.

2.) In a large bowl toss together the chickpeas, olive oil, garlic powder, cumin, cayenne pepper, and salt so that all ingredients are thoroughly combined.

3.) Transfer the chick peas to the baking sheet and place in the preheated oven for 40 minutes. Check on them at this point and if you’d like them a bit crisper, bake for another 10 – 20 minutes, checking on them often. Remove from oven when they’re your preferred texture.

4.) Serve and enjoy!

*Roasted Chickpeas can be stored in an airtight container at room temperature for 2 – 3 days.

Spinach and Mushroom Frittata

Originally published on April 27, 2014

To me, eggs really are the perfect food, which is why I especially love dishes like this one that really show them off. Frittatas are super easy, you can stuff whatever you’d like into them, and they’re not just for breakfast. Growing up, I remember one of my friend’s families had a leftover frittata every Friday night. At the time I didn’t know what a frittata was, but I did know that in their house at least, it held the leftovers from the past week – including spaghetti and meatballs. Now, I’ve never tried putting pasta in my frittata, but this one with spinach and mushrooms is pretty good.

Ingredients:

6 eggs
1 cup sour cream, divided 
2 shallots, diced 
2 garlic cloves, minced 
1 cup sliced mushrooms 
1 pound (about 4 cups) spinach 
1/2 cup chopped fresh parsley, divided
1/2 cup cheese of your choice
2 tablespoons vegetable oil 
Salt
Pepper 

Directions:

1.) Preheat broiler.

2.) Heat oil in a stainless steel or cast iron skillet set over medium heat. Add mushrooms and cook for about five minutes, until they are almost carmalized. Then add shallots and garlic and cook for another minute or two, just until fragrant. Add spinach and cook until wilted, turning regularly, about two to three minutes. Season with salt and pepper.

3.) In a large bowl, lightly beat the eggs together. Add 1/2 a cup of the sour cream, 1/4 cup of the fresh parsley, and the cheese, and whisk together until well combined. Season with salt and pepper, and then pour the entire mixture into the skillet. Give everything a stir once to evenly distribute and then let it set and cook, about three to four minutes, until you can see the very edges start to firm up and set.

4.) Place the entire skillet under the broiler for about two minutes, just until the top is set, and the entire frittata is cooked through.

5.) Remove from the oven and sprinkle with the remainder of the fresh parsley. Serve with a dollop of sour cream on top, or to the side.

6.) Serve and enjoy!

No Bake Mac n’ Cheese

Originally published on April 28, 2014

I have a couple different versions of mac n’ cheese on the site, and all of them are baked. But when you bake traditional macaroni and cheese, there’s a problem – at least in my eyes. All of that deliciously melted cheese bakes and gets much firmer. It no longer runs all over your plate. It will no longer be ooey gooey. And all the hard work you’ve put into making that bechamel sauce pretty much goes down the drain. It’s for these reasons that my family has never really liked macaroni and cheese – and why I was so determined to somehow get it back onto our table. Now, I’ve found the answer.

Forget about the oven altogether. Instead, toss the cooked macaroni in the sauce, and just top it with toasted breadcrumbs like you do with pasta al pangrattato (because you have to keep the breadcrumbs, they’re the best part.) But do not, whatever you do, toss it in the oven! At the last minute, pull it all together and you’ll finally have all that cheesiness dripping down your chin when it’s time to eat. I hesitate to say that this will be the only mac n’ cheese I’m making from now on (I’m hesitant to say that about any dish,) but it certainly is a good one to have in your wheelhouse.

Ingredients:

1/2 package (about 4 cups) dried penne or other pasta
4 tablespoons butter, divided
2 tablespoons all-purpose flour 
2 1/2 cups milk
1 cup fresh Parmesan cheese, grated, plus 1/2 cup 
1 cup Fontina cheese, grated
1/2 cup mozzarella cheese, grated 
1 cup breadcrumbs
1 clove garlic, minced 
1/4 cup fresh parsley, minced 
Salt 
Pepper 

Directions:

1.) Bring a very large pot of water to a boil. When it comes to a rapid boil, salt generously and add the dried pasta. When pasta is done, reserve one cup of the pasta water and drain until the bechamel sauce is ready.

2.) Meanwhile, make the bechamel sauce. In a saucepan set over medium heat, melt two tablespoons of butter. When melted, add two tablespoons of flour and whisk until it’s fully combined. Cook for about two minutes, whisking constantly. Then slowly add the milk, whisking as you do, until everything has fully combined. You need to do this slowly, otherwise you’ll have difficulties mixing it all together. When all the milk has been added, cook the mixture for another two or three minutes, until it has begun to thicken. Then turn off heat, and add all the cheese very slowly, making sure you fully incorporate it all after each addition. Taste, and season with salt and pepper.

3.) When the bechamel sauce is finished, you can start making the al pangrattato to top the mac n’ cheese. Start by setting a skillet over medium heat and melting the remaining two tablespoons of butter. When melted, add breadcrumbs, garlic, parsley, salt, and pepper. Cook, stirring constantly, until the breadcrumbs are nicely toasted brown and are very aromatic.

4.) Then just assemble. Add the drained pasta to the cheese sauce and stir to thoroughly coat all noodles with the sauce. Serve onto individual plates, and top with al pangrattato. Divide remaining Parmesan cheese among the plates equally, and sprinkle on top.

5.) Serve and enjoy!

French Fries

Originally published on April 30, 2014

French fries. They seem so simple, don’t they? Slice up some potatoes, throw ‘em into a deep fryer, and fry until beautifully golden brown and crispy before dunking them in ketchup. But hold on for just a second. If that’s actually how you go about making French fries, you’ll be extremely disappointed with the hard little potato bits that you’ll end up with. Truthfully, getting the very best French fries is a bit of a process. Do it right though, and you’ll have the same kind of beautiful fries you usually only find at chip trucks in the summertime (only now you can have them year-round at your house!)

Ingredients:

6 – 8 potatoes, with their skins on
Salt 
1 – 2 litres of peanut or vegetable oil (depending on how big your deep fryer is) for frying 

Directions:

1.) Scrub potatoes clean and then slice lengthwise so you have three or four large pieces of potato. Then, lay flat on a cutting board and slice lengthwise again, creating thick-cut fries.

2.) When all potatoes have been sliced, place in a very large bowl of ice water and leave in the fridge for at least an hour up to overnight. This removes the starch from the potatoes,which will result in crispier French fries.

3.) When ready to fry, fill a deep fryer or a large pot with oil (leaving an inch or two at the top to keep oil from bubbling over) and preheat to approximately 325 degrees (if you don’t have a deep frying thermometer, preheat the oil over medium heat.) It won’t be piping hot, but it should be warm enough to cook potatoes. When hot, add potato slices in batches and fry just until the potatoes are soft, about five to ten minutes. Remove and drain on paper towels before transferring to a bowl.

4.) When all potatoes have had their first fry, turn the temperature up to about 375 degrees (this is medium-high heat.) When the oil reaches the higher temperature, again add potato slices in batches and fry until potatoes are golden brown and crispy, about five minutes. When one batch is done, remove from heat and drain again on paper towels. Season with salt immediately, and continue with the remaining potato slices until all have been cooked twice.

5.) Serve and enjoy!