Bobby’s Pizza Dough

Originally published on April 8, 2014

I’ve made pizza dough before, probably about a hundred times. But Bobby Flay’s recipe is a great example of why you should never tie yourself down to just one recipe. Because sometimes, branching out leads you to bigger and better things; like I did when I tried Flay’s dough. Bobby’s dough is much lighter, much flakier, and much more – well – like the way I think pizza dough is supposed to taste and look. And dare I say, it’s even easier to make than what I had been doing.

I do however, make one slight change when I make it. I add the sugar and yeast to the warm water and bloom the yeast before adding it to the dough. It’s not that I don’t trust Bobby Flay, but I do know that salt kills yeast. And I know that sugar helps it live. This trick might just be what makes this dough what it is. Bobby also uses a stand mixer for his. Until I win the lottery and can spend over $300 on a not-really-necessary kitchen appliance, I’m stuck with my food processor (which I love, by the way.) If you’re in the same boat, don’t worry. This recipe will do just fine in it.

Ingredients:

3 1/2 – 4 cups bread flour
1 teaspoon sugar
1 envelope instant dry yeast
2 teaspoons kosher salt
1 1/2 cups warm water, about 110 degrees Fahrenheit
2 tablespoons olive oil, plus 2 teaspoons

Directions:

1.) Bring water to temperature over medium heat on the stove top. When warm, add the yeast and the sugar and stir to combine.

2.) Meanwhile, combine the bread flour and kosher salt in a food processor. Pulse to combine. When the water is warm enough, add to the food processor along with two tablespoons of the oil. Allow the processor to continue running until the dough has formed a ball. Scrape the dough onto a lightly floured surface and gently knead into a smooth ball.

3.) Grease a large bowl with the remaining 2 tablespoons of olive oil. Place dough inside, cover the bowl with a clean tea towel, and allow to sit in a warm area until the dough has doubled in size, about one hour.

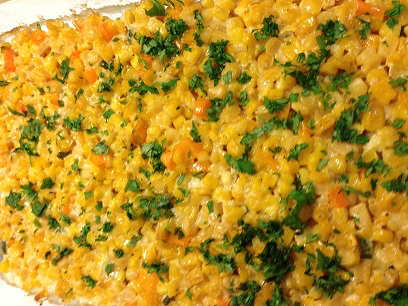
4.) Once dough has risen once, turn it back out onto a lightly floured surface and divide into two equal portions. Cover again with the tea towel and allow to rest for 10 minutes before rolling it out (or taking great joy out of tossing it up in the air,) covering with toppings, and baking in a preheated oven.

5.) Serve and enjoy!

My Best Buffalo Wings

Originally published on April 9, 2014

Yesterday we talked pizza so I thought today I’d tell you about my perfect recipe for chicken wings. The technique is essential; whether or not you make yours buffalo is up to you. Because the flour coating gives the chicken a bit oomph, it stands up really well to any kind of sauce. I did taste them before they were dressed, when they were still salt and pepper wings; they were really good that way too. But now, on to the technique.

I’ve made chicken wings about a bazillion times, and for years have just been dumping them in deep fryer after rinsing and drying. They were never quite the crispy texture I was going for, but they were better than what I had come up with back in the day. Then I used to bake them, or bread them before throwing them in the fryer or oven. But I never really liked those results either. Although the crunch factor was definitely there, the result was just too much breading for my liking. So, it was naked wings back into the fryer, even though a few were bound to always come out slimy.

Then, I had my head-smack moment. That moment when you suddenly realize there’s a much better way to do something than what you are, and smack your hand to your head, wondering how you could have possibly been so stupid all along.

When it came to my chicken wings, the answer was flour. No egg, no breading, just flour that coats the wings before they’re plunged into hot oil. The result? My very best Buffalo Wings.

Ingredients:

1 package chicken wings 
2 cups all-purpose flour
Salt 
Pepper 
1/2 cup Frank’s Red Hot, or other hot sauce 

Directions:

1.) Bring a deep fryer or Dutch oven filled with about 8 cups of oil to a temperature of 375 degrees Fahrenheit over medium-high heat.

2.) While oil is heating, place chicken wings in a bowl and sprinkle salt and pepper over top. Toss to coat. Shake flour over top of the chicken, and toss again to coat. One by one, remove chicken wings from the bowl of flour, shaking off excess as you do. Place on a plate or platter until oil is ready to use and continue with remaining wings.

3.) When oil is hot, add one small batch of wings to the fryer (I usually put about 6 or 7 in there, but it will depend on how big your wings and your fryer are.) Fry until chicken is crispy and golden brown all over, about 5 – 7 minutes.

4.) When batch is finished cooking, remove from the fryer and place chicken wings on a plate lined with paper towel. Set aside and place another batch of chicken wings into the fryer. Salt chicken wings that have been removed and placed on the platter and cover to keep warm.

5.) Repeat the process of adding wings to the fryer, cooking, removing and salting until all chicken wings have been fully cooked.

6.) Place cooked chicken wings into a large bowl and add Frank’s Red Hot sauce. Toss to coat.

7.) Serve and enjoy!

Ree’s Corn Casserole

Originally published on April 10, 2014

I don’t typically mess with corn too much. It’s the one vegetable hubby will eat, and he hates it when I go toying with his favourites. But sometimes, you try something different and good things happen. And I was pretty sure those good things would happen when I saw Ree Drummond make this on The Pioneer Woman. She uses red bell pepper, which is much prettier than the orange one I had on hand, and since it’s still only April around here, I used canned corn instead of fresh. Even with those substitutions, this recipe is just like her Crash Hot Potatoes and Blackberry Cobbler – it’s delicious!

Ingredients:

4 cans corn
2 orange bell peppers, diced
2 jalapeno peppers, diced
1 cup heavy cream
1/2 cup butter, cold and cut into pieces
2 teaspoons salt 
Pepper 
1/2 cup fresh cilantro, chopped

Directions:

1.) Preheat the oven to 350 degrees Fahrenheit and butter a 9″ x 13″ baking dish.

2.) Place the corn in a large bowl and add the bell peppers, jalapeno peppers, heavy cream, butter salt, and a generous pinch of pepper. Mix well to combine all ingredients.

3.) Pour into prepared baking dish and place in preheated oven. Bake for 45 – 55 minutes, until the entire mixture is hot and bubbly.

4.) Serve and enjoy!

Gordon’s One Skillet Breakfast

Originally published on April 11, 2014

Gordon Ramsay’s recipes typically fall into one of two categories. They’re either classic dishes made with traditional techniques, or they’re totally innovative and ingenious ideas. This one combines the two, and it’s a lot of fun to make. When Gordon made it on one of his many television shows, he managed to get the bacon right on top of the eggs. I guess my cast iron is a bit smaller than his, as mine didn’t fit. But it’s what you do with the bacon before it even meets the eggs that makes this dish really come alive. (It’s cooked in sugar!) Serve it on the side, serve it on top, either way it’s going to be super delicious. And it’s all the breakfast classics served up in a whole new way!

Ingredients:

6 russet potatoes, grated
4 whole eggs
8 slices bacon 
2 tablespoons brown sugar 
2 tablespoons vegetable oil 
1/2 cup fresh parsley, chopped 
Salt 
Pepper 

Directions:

1.) Preheat oven to 400 degrees Fahrenheit.

2.) With a box grater or in a food processor, grate potatoes. Place them in the centre of a paper towel or clean tea towel, bring up the sides of the towel, and twist them at the top so that the grated potatoes are tightly closed within. Over the sink, squeeze the towel as hard as you can, and for as long as you can. This will extract all of the juices from within the potatoes, and that will ensure that your potatoes brown and do not turn soggy in the pan.

3.) Heat the vegetable oil in a cast iron skillet set over medium heat. When you’ve extracted as much of the juice as you can, turn the potatoes out into a skillet and spread them around so they form an even layer over the bottom of the pan; they should cover the entire surface. Season with salt and pepper, and then place another skillet right on top of the potatoes. This can be another cast iron, or another skillet with some cans placed within it. The cans won’t get hot, they’ll just weigh down the second skillet, which will really press the potatoes down and they’ll start to form one large hash brown. Cook for about five minutes.

4.) Remove second pan and, with a spatula, start to lift up the edges of the potatoes. If the underside has started to turn brown, and the potatoes hold together, flip it all at once so that it remains one large hash brown. With the skillet still on the heat, crack the eggs right onto the potatoes, being sure not to break the yolk.

5.) Turn the heat off under the skillet, season the eggs with salt and pepper, and carefully place the entire thing in the oven. Cook, for about 12 minutes, until the eggs have set to your liking.

6.) While the skillet is in the oven, place strips of bacon in a separate skillet on the stove top over medium heat. Cook, turning occasionally, until the bacon is nearly crisp (but not quite,) and almost cooked through. When it’s gotten to that point, sprinkle the brown sugar into the skillet and stir it around so that it’s throughout the entire pan. Turn the bacon one more time, ensuring it gets fully coated with the sugar, and remove from heat when it’s entirely cooked through, and very crispy.

7.) Remove skillet from the oven, and cut into four different pieces, right along the edges of egg so that each serving gets one. Carefully place bacon on top (or serve on the side,) and sprinkle the entire thing with fresh parsley.

Apple & Brie Grilled Cheese Sandwich

Originally published on April 12, 2014

It’s National Grilled Cheese Sandwich Day! And April is National Grilled Cheese Sandwich Month! I’ve decided to meet the two food holidays in the middle and make this week Grilled Cheese Sandwich Week right here on Kate’s Cuisine. Stay tuned, I’ve got some great stuff planned for it!

There’s so much to love about grilled cheese sandwiches, but I think the thing I love the very most is that they’re so versatile. You really can do just about anything with them. This sandwich, stuffed with crisp apple slices and one of my very favourite cheeses is a great switch-up from the standard bread/cheese combination, but still lets you take great joy in the classic grilled cheese sandwich.

Ingredients:

2 pieces of white bread 
1/2 apple (of any variety,) thinly sliced 
1/4 red onion, thinly sliced 
1/3 cup Brie cheese, sliced with the rind removed
2 tablespoons butter

Directions:

1.) Spread butter evenly over one side of each piece of bread. Place one piece of bread, butter-side down, into the skillet and then turn the heat on under the skillet to medium. Butter the other side of the bread that’s in the skillet (this is the only way I’ve found to butter both sides of the bread, and not get it all over your hands or the counter.)

2.) On top of the bread that’s in the skillet, place Brie cheese, red onion slices, and apple slices. Place second piece of bread on top, with the butter side down. Butter the other side of the bread (the one that’s now facing you.)

3.) Allow the sandwich to cook for just a few minutes (about 3 probably,) and then lift it slightly to ensure that the bread has browned. If it has, carefully flip the sandwich over and cook for another three minutes, or until both sides of the bread have browned, and the cheese has fully melted.

4.) Serve and enjoy!

Grilled Tomato & Goat Cheese Sandwich

Originally published on April 13, 2014

In September of last year, both of my girls had gone off to school for a full day (for the first time ever!) and I had time in my afternoon to make myself a proper lunch  – rather than just grab whatever bites were left on their plates when they were done. I created this grilled cheese sandwich one day and it quickly became one of my favourites. You know how people sometimes say that the best dishes are those that have few ingredients, and are simple to prepare? This grilled cheese is both.

Ingredients:

2 slices white bread 
2 or 3 slices of tomato (depending on how big yours are)
2 or 3 thin slices of goat cheese (about 1/2 cup)
2 tablespoons butter
Salt 
Pepper 

Directions:

1.) Spread butter over one side of one slice of white bread and place, butter-side down, into a skillet before spreading butter over the other side.

2.) Turn heat under skillet to medium-low and spread butter over the other side of the bread in the skillet (so that you can get both sides buttered without messing up your hands or your counter top.)

3.) On top of the bread, place the tomato slices and then season with salt and pepper. Layer the goat cheese on top.

4.) Butter one side of the remaining slice and then place, butter-side down, onto the goat cheese. Butter the side facing up.

5.) Check to see if the sandwich is browning on the skillet side by gently lifting up one corner of the sandwich. If browned, flip and cook the other side. If not, continue cooking for 2-3 minutes, checking regularly to see if it is cooked through.

6.) Remove sandwich from the skillet once both sides have fully browned, and allow to rest for just a few minutes before slicing in half.

7.) Serve and enjoy!

Frog in a Hole Grilled Cheese Sandwich

Originally published on April 15, 2014

I lived off of Frogs in a Hole when I was in college. My best friend told me about them and I was instantly hooked. (And there may have been a time when we pretended we were on a cooking show while making them.) Aside from the entertainment though, a slice of bread and an egg is a pretty cheap meal for a starving student. But this meal is more than just good for the wallet; it’s good for the soul. It’s so satisfying! Warm bread, runny egg, butter smacking up against my lips as I eat it. Man! It’s no wonder I ate so many of them back then. Today though, I take it one step further.

By just adding another slice of bread (oh yeah, and all that cheese,) I’ve mashed up two comfort foods that I grew up on – the good ol’ Frog in a Hole, and a grilled cheese sandwich. The results, as you would expect, are divine. I seriously suggest cutting the sandwich all the way through before you even dive in, as that yummy egg yolk will act as a sauce that you can mop up with all the other sandwich bits. And that round piece you take out of the bread? Don’t you dare throw that away – it’s one of the best parts!

Ingredients:

2 slices white bread 
2 eggs 
1/2 cup cheddar or mozzarella cheese, sliced 
2 tablespoons butter, divided 
1 tablespoon vegetable oil 
Salt
Pepper 

Directions:

1.) Brush a skillet with the vegetable oil (so that the egg doesn’t stick.)

2.) Using about 1/4 of the butter, spread it on one side of one slice of bread. Place that bread in a skillet, butter-side down, before buttering the other side. Layer all of the cheese on top.

3.) Butter one side of the remaining slice of bread and then lay that, butter-side down, on top of the cheese. Butter the other side of the piece of bread.

4.) Using a cookie cutter, cut out a hole in the middle of the sandwich. When the hole is made, place the cut portion of the sandwich beside the bigger sandwich in the skillet (so that it can get all grilled and crispy golden brown too.) Turn the heat under the skillet to medium.

5.) Carefully crack two eggs into the hole you’ve cut out. Cook for about four minutes, until the egg has started to set on one side, and the bottom slice of bread is turning crispy and golden. (You will probably have some of the egg whites leak and be visible around the edges of the bread. That’s perfectly okay.)

6.) Using a wide spatula, flip the entire sandwich over once and cook for another four or five minutes. At the same time, flip over the “hole” portion of the sandwich to ensure an even cook there, too. (When you have first flipped the sandwich over, don’t worry if the eggs sink a bit. As the other side cooks, they will puff up and take up the entire hole.)

7.) Continue cooking until the entire sandwich is golden brown, the eggs have fully set to your liking, and the cheese has melted.

8.) Serve and enjoy!

Jen’s Grilled Cheeseburger Sandwich

Originally published on April 16, 2014

This is definitely not your everyday grilled cheese. With four slices of bread per serving, and tons of cheese that will drip down your chin as you eat it, it’s definitely an indulgence, but one that’s so worth it. I love the sauteed onions that are so sweet they actually cut through the richness of the meat and the cheese, and they also bring everything together quite nicely. Of course you can double or triple the recipe, whatever you need, as this only makes one. I warn you though. One sandwich may be enough to feed two people or, in my case, serve as your lunch for the next two days. There’s a lot going on here and this sandwich is very, very filling.

Of all the grilled cheese sandwiches we’ve talked about this week, this one is definitely the messiest so far. But it’s oh-so-goooood. 

Ingredients:

1/4 pound lean ground beef
1 teaspoon onion powder 
1 teaspoon garlic powder 
1 teaspoon paprika 
1 tablespoon vegetable oil 
1 cup Monterey Jack cheese, shredded and divided
1/2 onion, halved and thinly sliced
2 slices bacon 
4 slices white bread 
4 tablespoons butter, divided 
Salt
Pepper 

Directions:

1.) In a small bowl combine the beef, onion powder, garlic powder, paprika, salt, and pepper. Mix thoroughly and then shape entire mixture into a hamburger patty.

2.) Heat vegetable oil in a skillet set over medium heat and preheat oven to 200 degrees Fahrenheit. When oil is hot, add beef patty and cook for about five minutes on one side before flipping and cooking on the other side. Continue cooking until patty is cooked to your liking (medium, medium-well, etc.) and then transfer to an oven-proof dish. Place in the preheated oven to keep warm while you prepare the rest of the sandwich.

3.) Warm the same skillet you cooked the burger in over medium heat. When oil inside is hot, add the onions and stir to entirely coat in the fat. Season with salt and pepper and then stir and cook so the onions can cook down and become carmalized and sweet, for about five to ten minutes.

4.) Meanwhile, in a separate skillet, cook bacon over medium heat until it becomes crisp. When finished, remove to paper towels to drain some of the fat, and set aside for now.

5.) Butter each slice of bread on just one side. Place two slices in a separate skillet, butter-side down, and turn heat under skillet to medium. Place nearly half of the cheese on one slice of bread, and half on the second slice (you will need a bit more cheese when it’s time to assemble, so leave a small handful to use later.)

6.) Butter the two remaining slices of bread not in the skillet, and then place those, butter-side up, on top of the two pieces in the skillet. Cook until one side of both sandwiches are crisp and golden brown, then flip to cook the other side of both sandwiches.

7.) When both grilled cheese sandwiches are just about done cooking, place a small amount of the remaining cheese (about half of it) on the top of one sandwich, without removing it from the skillet. Remove the hamburger patty from the preheated oven and place that on top of the cheese. Layer the onions and the bacon onto the patty, and then finish with whatever remaining cheese you have. Place the second grilled cheese sandwich right on top.

8.) Turn heat off, remove entire sandwich from the skillet and place on a cutting board to slice in half.

9.) Serve and enjoy!

Croque Monsieur

Originally published on April 17, 2014

Leave it to the French to take something as simple as a ham and cheese sandwich and turn it into something much fancier, and much more decadent.

I don’t know if you can even call the Croque Monsieur a grilled cheese sandwich, since it’s cooked under the broiler and not in a skillet, but it may have ruined me for all ham and cheese sandwiches from this point forward. As it turns out, Gruyere is another new favourite cheese I’ve discovered during Grilled Cheese Week, and it’s everywhere in this sandwich. It blends beautifully with the ham inside, and is also in the bechamel that smothers the entire thing. All that cheese and sauce does make this one a bit of a mess to eat, like Jen’s Grilled Cheeseburger Sandwich, and you’ll probably have to use a knife and fork. Also similar to another sandwich covered here during the week, the Frog in a Hole Grilled Cheese, you can top the Croque Monsieur with a fried egg and turn it into a Croque Madam.

Ingredients:

2 tablespoons butter, plus one 
2 tablespoons flour 
1 1/2 cups milk
Salt 
Pepper 
A pinch of nutmeg 
1 1/2 cups Gruyere cheese, shredded
1/4 cup Parmesan cheese
8 slices French bread 
8 thin slices of ham 
6 tablespoons Dijon mustard 

Directions:

1.) Preheat the broiler. When hot, place bread on a broiler tray and place in the oven for one or two minutes, to toast. Be sure to keep an eye on it, as anything placed under the broiler can burn very quickly. Remove from broiler when toasted, and set aside.

2.) Meanwhile, make the bechamel sauce. Melt butter over medium heat until it’s just bubbling. Add the flour, whisk to thoroughly combine until smooth, and then cook for about two minutes. Slowly add milk while whisking constantly. After all milk has been added, cook for another five or six minutes, until the entire mixture thickens. Remove from heat and add Parmesan, Gruyere, salt, pepper, and nutmeg. Taste and adjust seasonings, if necessary.

3.) When toast has been removed from the broiler, brush four slices with Dijon mustard and top with two slices of ham each, and the remaining Gruyere divided up among the four. Finish by topping with remaining toasted slices of bread.

4.) Divide the bechamel between the four sandwiches, and spoon over top while sandwiches remain on the broiler tray. Sprinkle with any remaining Gruyere cheese. Return to under broiler and broil for three to five minutes, until the entire thing is hot and bubbly.

5.) Serve and enjoy!

Mom’s Grilled Cheese Sandwich

Originally published on April 18, 2014

My mom loves grilled cheese sandwiches. In fact, she loves them more than anyone I’ve ever known. Like many homes, they were a staple in my house growing up, and it wouldn’t surprise me to learn that they were actually one of the building blocks of my culinary interest today. I mean, what’s more simple and beautiful than a basic grilled cheese sandwich? If you’re making them like my mom though, there are a couple of rules to follow.

The first, use white cheese. While I’m sure I had many Kraft Singles in between my grilled cheeses as a kid, my mom loves white cheese far more than she does any other kind (and I’m not sure she even touches that processed stuff anymore.) I’ve used Fontina in this sandwich, but any cheese will do so long as it’s white.

Second, cut the sandwich in four. This my friends, is non-negotiable. Mom insists that this is the way grilled cheese sandwiches were meant to be served, and I’m inclined to agree with her. There is after all, a certain joy that comes from nibbling on those small triangles (and seeing that melted stuff in all its glory as it oozes between those slices.)

Then, just enjoy. But really enjoy it, knowing that some of the best things in life are sometimes also the simplest. It’s a lesson Mom taught me when she was still making all my grilled cheeses for me, and one that has stayed with me to this day. And it’s probably why, even after all the many different versions of grilled cheese we’ve looked at this week, this one is still my favourite. Because it’s simple, it’s perfection,and it’s the one Mom taught me how to make.

So Mom, this one is for you. For all the sandwiches, I thank you.

Ingredients:

2 slices white bread 
2 tablespoons butter 
1/2 cup Fontina cheese, shredded

Directions:

1.) Spread butter over one slice of the bread, and then place in a skillet, butter-side down. Butter the other side. Place cheese over the entire slice. Butter the other slice of bread and then place on top of the cheese, butter-side down as well. Then butter the top of that slice.

2.) Turn heat to medium and cook, until one side is crispy and golden brown, about three minutes. Flip, and cook the other side of the sandwich for another two to three minutes, until that side is also crispy and golden, and the cheese inside has melted entirely.

3.) Remove from heat, let sit for just a minute, and then cut into four.

4.) Serve and enjoy!