Originally published on February 15, 2014
Ah, choux pastry. This is one of those items that I happen to have a funny little cooking story about (my favourite kind of recipe!) I first heard about, and saw, people making choux pastry on shows such as MasterChef and Chopped – all those shows where the chefs are trying to make something that will really knock the socks off the judges. When I first heard of it, and for some time after, I thought it was called “shoe pastry.” Now, the reason for this is pretty reasonable. When I first saw someone making it, the dough was in a long thin shape. Knowing that it was meant for something to be slipped inside of the pastry, it made perfect sense to me that it would be called “shoe pastry.” Long, thin, meant to hold something. Sounded like a shoe to me. Then I found out that it’s actually called “choux pastry.”
Again though, I jumped to the wrong conclusion at first. Choux? What did that mean? I knew that choux pastry is a French pastry, so I decided (all on my own) that “choux” in French must mean “hollow.” After all, the hollowness of this pastry is one of its most defining characteristics, so that must be it. Right? No. In fact, I couldn’t have been farther from the mark. “Choux” actually means – of all things – “cabbage” in French. And this type of pastry is called “choux” because apparently to some, it looks like little cabbages when it’s finished cooking. Okay, so I don’t agree with that, but at least now when you say “choux pastry,” you might have an idea of what you’re talking about.
Ingredients:
1 1/2 cups water
Pinch salt
3/4 cup butter
4 teaspoons sugar
1 1/2 cups flour
6 eggs, lightly beaten
1 1/2 teaspoon vanilla
2 teaspoons milk
Directions:
1.) Preheat the oven to 375 degrees Fahrenheit.
2.) In a large saucepan on the stove, combine the water, salt, butter, and sugar; bring to a boil. Once boiling, remove the pan from the heat and add the flour. Beat quickly, until a dough begins to form and the dough starts to pull away from the sides of the pan. Place the pan back over the heat for just a minute or two, beating the entire time.
3.) Remove the pan from the heat and roughly one at a time, beat the eggs into the mixture, making sure the egg is entirely incorporated before adding another. You may not need all the eggs here – keep whatever egg you don’t use to the side, mixed with the milk and ready to use. Your dough in the saucepan will be finished when you can place a large dollop onto a wooden spoon and it’s glossy but falls heavily to the bottom of the saucepan.
4.) Beat in the vanilla and spoon the dough into a piping bag.
5.) Pipe balls of the dough onto a baking sheet lined with parchment paper, so that the balls are about an inch large, and spaced about two inches apart on the baking sheet. Brush the tops with a bit of the egg/milk mixture for a glaze, and then push any pointed tops down with your finger.
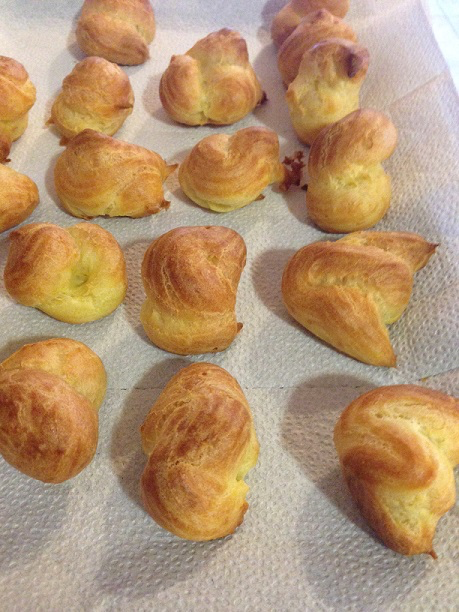
6.) Place in the preheated oven and bake for 25 to 30 minutes, until the dough is hollow inside (see pic below.) You can test this by pulling just one out of the oven, opening it, and seeing if it is in fact, hollow.
7.) When all pastry is done baking, remove from oven and move to wire racks to cool completely. This will ensure that the pastry does not become soggy, and that it does not collapse.
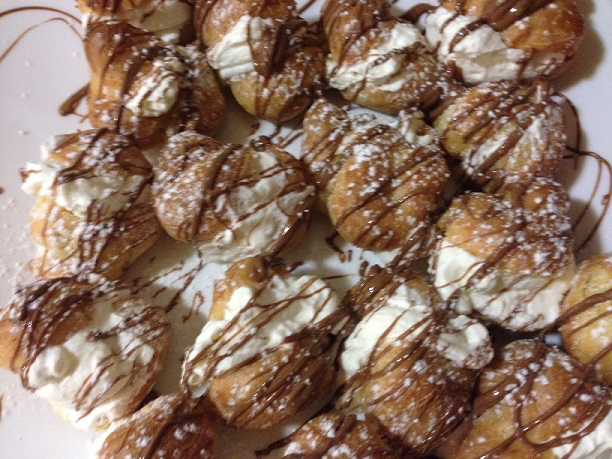
8.) When completely cooled, slice off the tops, fill with whipped cream, and drizzle or dollop with chocolate on top for the perfect profiteroles.
9.) Serve and enjoy!